Contents
I. Introduction

Welcome to the world of barbecue grilling! Whether you’re a seasoned pro or a beginner, this article will provide you with the secrets and techniques to achieve the perfect BBQ. From choosing the right equipment to mastering the art of flavor, we’ve got you covered.
Barbecue grilling is not just about cooking food; it’s a social experience that brings people together. The sizzling sounds, the mouthwatering aromas, and the taste of perfectly grilled meat are all part of the magic. But achieving that magic requires some know-how.
In this article, we will explore various aspects of barbecue grilling, including different types of grills, essential tools and accessories, and techniques for achieving the best results. We will also delve into the world of marinades, rubs, and sauces, as well as share some insider tips and tricks.
Whether you prefer charcoal, gas, or electric grills, we will guide you through the pros and cons of each. We will also discuss the importance of temperature control, cooking times, and the art of achieving those beautiful grill marks.
Furthermore, we will explore different grilling methods such as direct and indirect heat, smoking, and rotisserie cooking. We will explain how to choose the right wood chips for smoking and how to create a mouthwatering smoky flavor.
So, if you’re ready to take your grilling skills to the next level and impress your family and friends with your barbecue prowess, let’s dive in and uncover the secrets to perfect BBQ grilling!
II. Types of Barbecue Grills

A. Charcoal grills
When it comes to barbecue grilling, charcoal grills are a classic choice that many enthusiasts swear by. These grills use charcoal briquettes or lump charcoal as the fuel source, providing a distinct smoky flavor to the food. There are several benefits to using a charcoal grill:
- 1. Enhanced flavor: The smoky flavor imparted by charcoal grills is unmatched. It adds a delicious depth to your grilled dishes, making them more savory and satisfying.
- 2. Versatility: Charcoal grills offer a wide range of cooking options. You can adjust the heat by manipulating the charcoal placement, allowing for both direct and indirect grilling. This versatility is especially useful when preparing different types of meats and vegetables.
- 3. Portability: Charcoal grills are often lightweight and portable, making them ideal for outdoor adventures such as camping trips or beach picnics. Their compact size allows for easy transportation and setup wherever you go.
- 4. Affordable: Compared to gas grills, charcoal grills are generally more affordable. They come in various price ranges, making it accessible for grill enthusiasts on a budget.
When it comes to choosing a charcoal grill, there are several popular brands on the market that have gained a reputation for their quality and performance. Some of these brands include:
- 1. Weber: Weber is a well-known brand in the barbecue industry, offering a wide range of charcoal grills. Their grills are known for their durability, excellent heat retention, and innovative features such as the One-Touch cleaning system.
- 2. Kamado Joe: Kamado Joe is another top brand that specializes in ceramic charcoal grills. Their grills are known for their exceptional heat retention, precise temperature control, and versatility.
- 3. Big Green Egg: Big Green Egg is a popular brand that has gained a cult following among barbecue enthusiasts. Their ceramic charcoal grills are renowned for their superior heat retention, allowing for consistent and even cooking.
B. Gas grills
If convenience and ease of use are your priorities, gas grills are an excellent choice for barbecue grilling. These grills use propane or natural gas as the fuel source, providing instant heat at the push of a button. Here are some advantages of using a gas grill:
- 1. Quick and convenient: Gas grills heat up quickly and are ready to cook in a matter of minutes. This makes them perfect for those impromptu backyard gatherings or weeknight dinners.
- 2. Precise temperature control: Gas grills often come with built-in temperature control knobs, allowing you to adjust the heat with precision. This feature is particularly useful when cooking delicate foods that require specific temperature ranges.
- 3. Easy cleanup: Gas grills are generally easier to clean compared to charcoal grills. They don’t produce ash or charcoal residue, saving you time and effort in the cleaning process.
- 4. Additional features: Many gas grills come with additional features such as side burners, rotisserie attachments, and warming racks. These features enhance the versatility of the grill and allow you to prepare a wider range of dishes.
When it comes to choosing a gas grill, there are several top brands that have established themselves as leaders in the market. These brands are known for their quality construction, performance, and durability. Some of the top gas grill brands on the market include:
- 1. Weber: Weber also offers a range of gas grills that are highly regarded for their quality and performance. Their grills feature durable construction, powerful burners, and innovative features such as the Flavorizer bars.
- 2. Napoleon: Napoleon is a renowned brand that offers a wide selection of gas grills. Their grills are known for their sleek design, advanced cooking technology, and high heat output.
- 3. Broil King: Broil King is another trusted brand in the gas grill market. Their grills are known for their solid construction, even heat distribution, and precise temperature control.
Whether you prefer the traditional smoky flavor of charcoal grills or the convenience of gas grills, both options offer unique advantages for barbecue grilling. Consider your cooking preferences, budget, and lifestyle when choosing the right grill for your needs. With the right grill, you can elevate your barbecue game and create memorable culinary experiences for yourself and your loved ones.
III. Essential Grilling Tools and Accessories
:max_bytes(150000):strip_icc()/Tips-for-Grilling-Over-Charcoal-FT-BLOG0523-8d4244735734407593decd47b912ac5c.jpg)
When it comes to barbecue grilling, having the right tools and accessories can make all the difference in achieving that perfect BBQ. Whether you’re a seasoned grill master or just starting out, having these essential grilling tools will ensure that your cooking experience is smooth and enjoyable.
A. Grill brushes and scrapers
One of the most important tools for maintaining a clean and well-maintained grill is a grill brush or scraper. These tools are designed to remove any leftover food particles, grease, and debris from the grates, ensuring that your food cooks evenly and doesn’t stick to the surface. Look for a grill brush with sturdy bristles that can effectively clean the grates without scratching them. Additionally, consider opting for a scraper with a long handle to keep your hands safe from the heat.
B. Grilling tongs and spatulas
Grilling tongs and spatulas are essential for flipping and turning your food on the grill. Look for tongs with a long handle to keep your hands away from the heat, and ensure that they have a good grip to securely hold your food. Spatulas are great for flipping delicate items like fish or burgers without breaking them apart. Opt for a spatula with a thin, flexible blade that can easily slide under the food without causing any damage.
C. Meat thermometers
When it comes to grilling meat, achieving the perfect level of doneness is crucial. A meat thermometer is a must-have tool to ensure that your meat is cooked to perfection, whether you prefer it rare, medium, or well-done. Look for a digital meat thermometer with an instant-read feature for accurate and quick temperature readings. This will help you avoid overcooking or undercooking your meat, resulting in juicy and flavorful results every time.
D. Grill mats and grilling baskets
Grill mats and grilling baskets are handy accessories that can make grilling certain foods much easier. Grill mats are non-stick mats that can be placed directly on the grill grates, preventing food from sticking and falling through the cracks. They are especially useful for grilling delicate items like fish, vegetables, or small pieces of meat. Grilling baskets, on the other hand, are perfect for grilling smaller items that might otherwise fall through the grates, such as shrimp, sliced vegetables, or even diced meat. These accessories ensure that your food cooks evenly and makes flipping and removing them from the grill a breeze.
E. BBQ gloves and aprons
Protecting yourself while grilling is essential, and BBQ gloves and aprons are the perfect accessories for that. BBQ gloves are heat-resistant gloves that allow you to handle hot grill grates, utensils, and even hot food with ease and without the risk of burning your hands. Look for gloves made from high-quality materials like silicone or heat-resistant fabric for maximum protection. Additionally, wearing an apron will not only protect your clothes from grease and stains but also provide a convenient place to store your grilling tools and accessories, keeping them within reach whenever you need them.
Investing in these essential grilling tools and accessories will not only enhance your grilling experience but also ensure that you achieve the best results every time you fire up the grill. With the right tools at your disposal, you’ll be well on your way to becoming a BBQ master in no time!
IV. Preparing the Grill

A. Cleaning and Maintenance Tips
Keeping your grill clean and well-maintained is essential for optimal performance and longevity. Here are some tips to help you keep your grill in top shape:
- Regularly clean the grates: After each use, use a grill brush to remove any food residue or grease from the grates. This will prevent buildup and ensure even heat distribution.
- Check for grease buildup: Grease can accumulate in the drip tray or grease pan, which can lead to flare-ups and uneven cooking. Clean these areas regularly to prevent any issues.
- Inspect the burners: Over time, burners can become clogged with debris or rusted. Inspect them regularly and clean or replace as needed to ensure proper gas flow and heat distribution.
- Wipe down the exterior: Use a damp cloth or sponge to clean the exterior of the grill, removing any dirt or grime. This will keep your grill looking great and prevent any damage.
- Store your grill properly: If you’re not using your grill for an extended period, make sure to clean it thoroughly and store it in a dry, covered area to protect it from the elements.
B. Properly Arranging Charcoal for Even Heat Distribution
When using a charcoal grill, arranging the charcoal properly is crucial for even heat distribution. Follow these steps to ensure your charcoal is set up correctly:
- Choose the right charcoal: There are different types of charcoal available, such as briquettes or lump charcoal. Experiment with different types to find the one that suits your grilling needs.
- Use a charcoal chimney: A charcoal chimney is a great tool for lighting charcoal quickly and evenly. Fill the chimney with charcoal and place crumpled newspaper or a fire starter at the bottom. Light the newspaper or fire starter, and the charcoal will be ready in about 15-20 minutes.
- Arrange the charcoal: Once the charcoal is lit, carefully pour it onto the charcoal grate in your grill. Spread the charcoal out in a single layer for even heat distribution. For indirect grilling, create two separate zones by placing the charcoal on one side of the grill.
- Control the airflow: Adjust the vents on your grill to control the airflow. Opening the vents will increase the heat, while closing them will decrease it. Experiment with different vent positions to achieve the desired temperature.
- Preheat the grill: Allow the charcoal to burn for a few minutes until it turns gray and ashy. This indicates that it’s ready for grilling. Close the lid and let the grill preheat for a few minutes before placing the food on the grates.
C. Preheating Gas Grills for Optimal Cooking
Preheating your gas grill is essential for optimal cooking results. Follow these steps to preheat your gas grill:
- Turn on the gas: Open the gas valve on your propane tank or natural gas line. Make sure the control knobs on the grill are in the off position.
- Open the lid: Open the lid of your grill to allow any gas buildup to dissipate.
- Turn on the burners: Turn on the burners to the highest setting. If your grill has multiple burners, light them one by one, starting from the farthest burner from the gas source.
- Close the lid: Once all the burners are lit, close the lid and let the grill preheat for about 10-15 minutes. This will allow the grates to heat up evenly.
- Adjust the temperature: After preheating, adjust the temperature to the desired level by turning the control knobs. This will ensure consistent heat throughout the grilling process.
By following these tips for cleaning, arranging charcoal, and preheating your grill, you’ll be well on your way to achieving perfect BBQ results every time. Happy grilling!
V. Marinating and Seasoning
Marinating and seasoning are essential techniques in the world of barbecue grilling. They not only add flavor to the meat but also help to tenderize it, resulting in a juicy and delicious final product. In this section, we will explore the importance of marinating meat, the different types of marinades and their flavors, and various seasoning techniques for enhancing flavor.
A. Importance of Marinating Meat
Marinating meat is a process that involves soaking it in a mixture of ingredients to enhance its flavor and texture. The marinade typically consists of acidic components like vinegar, citrus juice, or yogurt, along with herbs, spices, and other flavor enhancers. The acidic ingredients help to break down the proteins in the meat, making it more tender and allowing the flavors to penetrate deeper.
One of the main benefits of marinating meat is that it adds moisture to the meat, preventing it from drying out during the cooking process. This is especially important when grilling lean cuts of meat, such as chicken breasts or pork tenderloin, which tend to dry out quickly. Marinating also helps to infuse the meat with a delicious combination of flavors, making it more enjoyable to eat.
When marinating meat, it is important to allow enough time for the flavors to develop. Depending on the type of meat and the recipe, marinating times can range from a few hours to overnight. It is best to marinate the meat in a sealed container or a zip-top bag in the refrigerator to prevent any cross-contamination or spoilage.
B. Types of Marinades and Their Flavors
There are various types of marinades, each with its own unique flavors and characteristics. Here are some popular types of marinades:
- 1. Teriyaki Marinade: This marinade is a combination of soy sauce, ginger, garlic, brown sugar, and sometimes pineapple juice. It adds a sweet and savory flavor to the meat, perfect for grilling chicken or beef.
- 2. Citrus Marinade: Made with citrus fruits like lemon, lime, or orange juice, this marinade adds a tangy and refreshing flavor to the meat. It works well with seafood, chicken, or pork.
- 3. Mediterranean Marinade: This marinade typically includes olive oil, lemon juice, garlic, and herbs like oregano and thyme. It imparts a Mediterranean flair to the meat, ideal for lamb, chicken, or vegetables.
- 4. Barbecue Marinade: A classic choice for grilling, barbecue marinades are often tomato-based and include ingredients like Worcestershire sauce, brown sugar, mustard, and spices. They give the meat a smoky and tangy flavor, perfect for ribs, chicken, or pork.
These are just a few examples, and the possibilities are endless when it comes to marinades. You can experiment with different combinations of ingredients to create your own signature marinade that suits your taste preferences.
C. Seasoning Techniques for Enhancing Flavor
In addition to marinating, seasoning is another crucial step in achieving the perfect barbecue flavor. Seasonings can be applied before, during, or after cooking, depending on the desired result. Here are some popular seasoning techniques:
- 1. Dry Rub: A dry rub is a mixture of herbs, spices, salt, and sugar that is rubbed onto the meat before cooking. It forms a flavorful crust on the surface of the meat and adds depth of flavor. Common ingredients in a dry rub include paprika, chili powder, garlic powder, onion powder, cumin, and brown sugar.
- 2. Wet Rub: Similar to a dry rub, a wet rub consists of herbs, spices, and other flavorings mixed with a liquid, such as oil or vinegar, to create a paste. This paste is then applied to the meat before cooking. The liquid helps to bind the seasonings to the meat and adds moisture. Wet rubs are particularly popular for grilling chicken or fish.
- 3. Basting: Basting involves brushing the meat with a sauce or marinade during the cooking process. This helps to keep the meat moist and adds an extra layer of flavor. Basting is commonly done with barbecue sauces, glazes, or even the leftover marinade.
- 4. Finishing Salt: Finishing salts are high-quality salts that are sprinkled on the meat just before serving. They add a burst of flavor and enhance the overall taste of the dish. Examples of finishing salts include sea salt, Himalayan pink salt, or flavored salts like smoked salt or truffle salt.
By using these seasoning techniques, you can elevate the flavor of your grilled meats and create a memorable dining experience for yourself and your guests.
VI. Meat Selection and Preparation
When it comes to grilling, choosing the right cuts of meat is crucial for achieving that perfect BBQ flavor. Different cuts of meat have varying levels of tenderness and fat content, which can greatly affect the taste and texture of your grilled dishes. In this section, we will explore the importance of selecting the right cuts of meat, trimming excess fat, and tenderizing techniques for tougher cuts.
A. Choosing the right cuts of meat for grilling
When selecting meat for grilling, it’s important to consider the cut and quality. Certain cuts are more suitable for grilling due to their tenderness and ability to retain moisture. Here are some popular cuts that are ideal for grilling:
- Ribeye: Known for its marbling and rich flavor, ribeye steaks are a favorite among grill enthusiasts. The high fat content keeps the meat juicy and adds a delicious flavor.
- New York Strip: This cut is tender, flavorful, and has a good amount of marbling. It grills well and is often a top choice for steak lovers.
- Tenderloin: Also known as filet mignon, tenderloin is the most tender cut of beef. It has a buttery texture and mild flavor, making it a popular choice for special occasions.
- Chicken thighs: Compared to chicken breasts, thighs are more forgiving on the grill. They have a higher fat content, which helps prevent them from drying out.
- Pork chops: Thick-cut pork chops are perfect for grilling. They have a good balance of fat and meat, resulting in juicy and flavorful chops.
Remember, the quality of the meat is just as important as the cut. Look for meat that is fresh, well-marbled, and sourced from reputable suppliers.
B. Trimming excess fat and preparing meat for grilling
While fat adds flavor to meat, excessive fat can cause flare-ups and result in a charred exterior. Trimming excess fat before grilling can help prevent this and ensure even cooking. Here are some tips for preparing meat for grilling:
- Remove visible fat: Use a sharp knife to trim any visible fat from the meat. This will help prevent flare-ups and reduce the risk of charring.
- Score the fat: If the meat has a thick layer of fat, score it with a knife in a crisscross pattern. This will allow the fat to render and melt away during grilling.
- Season the meat: Before grilling, season the meat with your favorite rub or marinade. This will enhance the flavor and tenderize the meat.
- Let the meat come to room temperature: Take the meat out of the refrigerator and let it sit at room temperature for about 30 minutes before grilling. This will ensure more even cooking.
By trimming excess fat and properly preparing the meat, you’ll achieve a perfect balance of flavor and tenderness in your grilled dishes.
C. Tenderizing techniques for tougher cuts of meat
Some cuts of meat, such as flank steak or brisket, can be tougher and require tenderizing to achieve optimal results. Here are a few techniques to tenderize tougher cuts:
- Marinating: Marinating meat in a mixture of acidic ingredients like lemon juice, vinegar, or yogurt can help break down the muscle fibers and make the meat more tender. Let the meat marinate for at least 30 minutes, or overnight for maximum tenderness.
- Using a meat mallet: Pound the meat with a meat mallet to break down the muscle fibers and tenderize it. Be sure to do this before seasoning or marinating the meat.
- Brining: Brining involves soaking the meat in a saltwater solution, which helps retain moisture and tenderize the meat. Brine the meat for a few hours or overnight before grilling.
- Using a meat tenderizer: A meat tenderizer tool with small blades can be used to pierce the meat and break down the tough fibers. This technique is especially useful for thicker cuts of meat.
Experiment with different tenderizing techniques to find the one that works best for the specific cut of meat you’re grilling. Remember to adjust the cooking time accordingly to ensure the meat is cooked to perfection.
By choosing the right cuts of meat, trimming excess fat, and employing tenderizing techniques when necessary, you’ll elevate your grilling game and create mouthwatering BBQ dishes that will impress your family and friends.
VII. Direct vs. Indirect Grilling
When it comes to barbecue grilling, there are two main methods that you can choose from – direct grilling and indirect grilling. Each method has its own benefits and is suitable for different types of food. In this section, we will explore the explanation of the direct grilling method, the benefits and tips for indirect grilling, and when to use each grilling method.
A. Explanation of Direct Grilling Method
The direct grilling method involves cooking the food directly over the heat source. This method is ideal for foods that require quick cooking times, such as steaks, burgers, and vegetables. When using the direct grilling method, it is important to preheat the grill to the desired temperature and place the food directly over the heat source.
One of the main benefits of direct grilling is the ability to achieve a nice sear on the food, which adds flavor and creates an appealing appearance. The high heat of direct grilling also helps to cook the food quickly and evenly. However, it is important to keep a close eye on the food when using this method to prevent burning or overcooking.
Here are some tips for successful direct grilling:
- Ensure that the grill grates are clean and well-oiled to prevent sticking.
- Flip the food only once to achieve a nice sear and avoid losing juices.
- Use a meat thermometer to ensure that the food reaches the desired internal temperature.
- Allow the food to rest for a few minutes before serving to lock in the juices.
B. Benefits and Tips for Indirect Grilling
Indirect grilling, on the other hand, involves cooking the food away from the direct heat source. This method is ideal for foods that require longer cooking times, such as whole chickens, roasts, and ribs. When using the indirect grilling method, the heat is circulated around the food, resulting in a slow and even cooking process.
One of the main benefits of indirect grilling is the ability to cook larger cuts of meat to perfection. The indirect heat helps to tenderize the meat and allows the flavors to develop slowly. Additionally, this method reduces the risk of flare-ups and allows for more control over the cooking process.
Here are some tips for successful indirect grilling:
- Set up a two-zone fire by placing the charcoal or burners on one side of the grill and leaving the other side empty. This allows for both direct and indirect heat zones.
- Use a drip pan filled with water or other flavorful liquids to add moisture and prevent flare-ups.
- Cook the food with the lid closed to maintain a consistent temperature and prevent heat loss.
- Use a meat thermometer to ensure that the food reaches the desired internal temperature.
C. When to Use Each Grilling Method
Knowing when to use each grilling method is key to achieving the best results. Here are some guidelines:
- Use direct grilling for foods that are small, thin, or require quick cooking times. This includes steaks, burgers, hot dogs, fish fillets, and vegetables.
- Use indirect grilling for foods that are large, thick, or require longer cooking times. This includes whole chickens, roasts, ribs, and large cuts of meat.
- Consider using a combination of both methods for foods that require searing and then slow cooking. For example, you can start by searing a steak over direct heat and then move it to indirect heat to finish cooking.
By understanding the differences between direct and indirect grilling and knowing when to use each method, you can take your barbecue grilling skills to the next level. Experiment with different techniques and recipes to discover your own barbecue grilling secrets for perfect BBQ.
VIII. Grilling Techniques for Different Foods
A. Grilling vegetables and fruits
Grilling vegetables and fruits is a great way to add a smoky flavor and enhance their natural sweetness. Here are some tips to help you achieve delicious results:
- Choose firm vegetables and fruits that can hold up well on the grill, such as bell peppers, zucchini, eggplant, corn, pineapples, and peaches.
- Preheat your grill to medium-high heat and lightly oil the grates to prevent sticking.
- For vegetables, slice them into even-sized pieces to ensure even cooking. Toss them with olive oil, salt, and pepper, or your favorite seasoning blend.
- Place the vegetables directly on the grill grates or use a grilling basket or skewers for smaller pieces.
- Grill the vegetables until they are tender and slightly charred, turning them occasionally to cook them evenly.
- For fruits, you can leave them whole or slice them into halves or wedges. Brush them with a little oil or melted butter to prevent sticking.
- Grill the fruits over medium heat until they are caramelized and have grill marks, usually just a few minutes per side.
- Serve the grilled vegetables and fruits as a side dish, in salads, or as a topping for burgers and sandwiches.
B. Tips for grilling seafood
Grilling seafood is a fantastic way to enjoy its natural flavors and create a delicious and healthy meal. Follow these tips for successful seafood grilling:
- Choose fresh seafood that is firm and has a mild aroma. Popular options for grilling include salmon, shrimp, scallops, and tuna.
- Preheat your grill to medium-high heat and clean the grates thoroughly to prevent sticking.
- Brush the seafood with olive oil or melted butter and season it with salt, pepper, and your favorite herbs and spices.
- Place the seafood directly on the grill grates, skin-side down if applicable, and cook it until it is opaque and flakes easily with a fork.
- Avoid overcooking the seafood, as it can become dry and rubbery. Keep a close eye on it and remove it from the grill as soon as it is done.
- Serve the grilled seafood with a squeeze of lemon or a flavorful sauce, such as garlic butter or a citrus salsa.
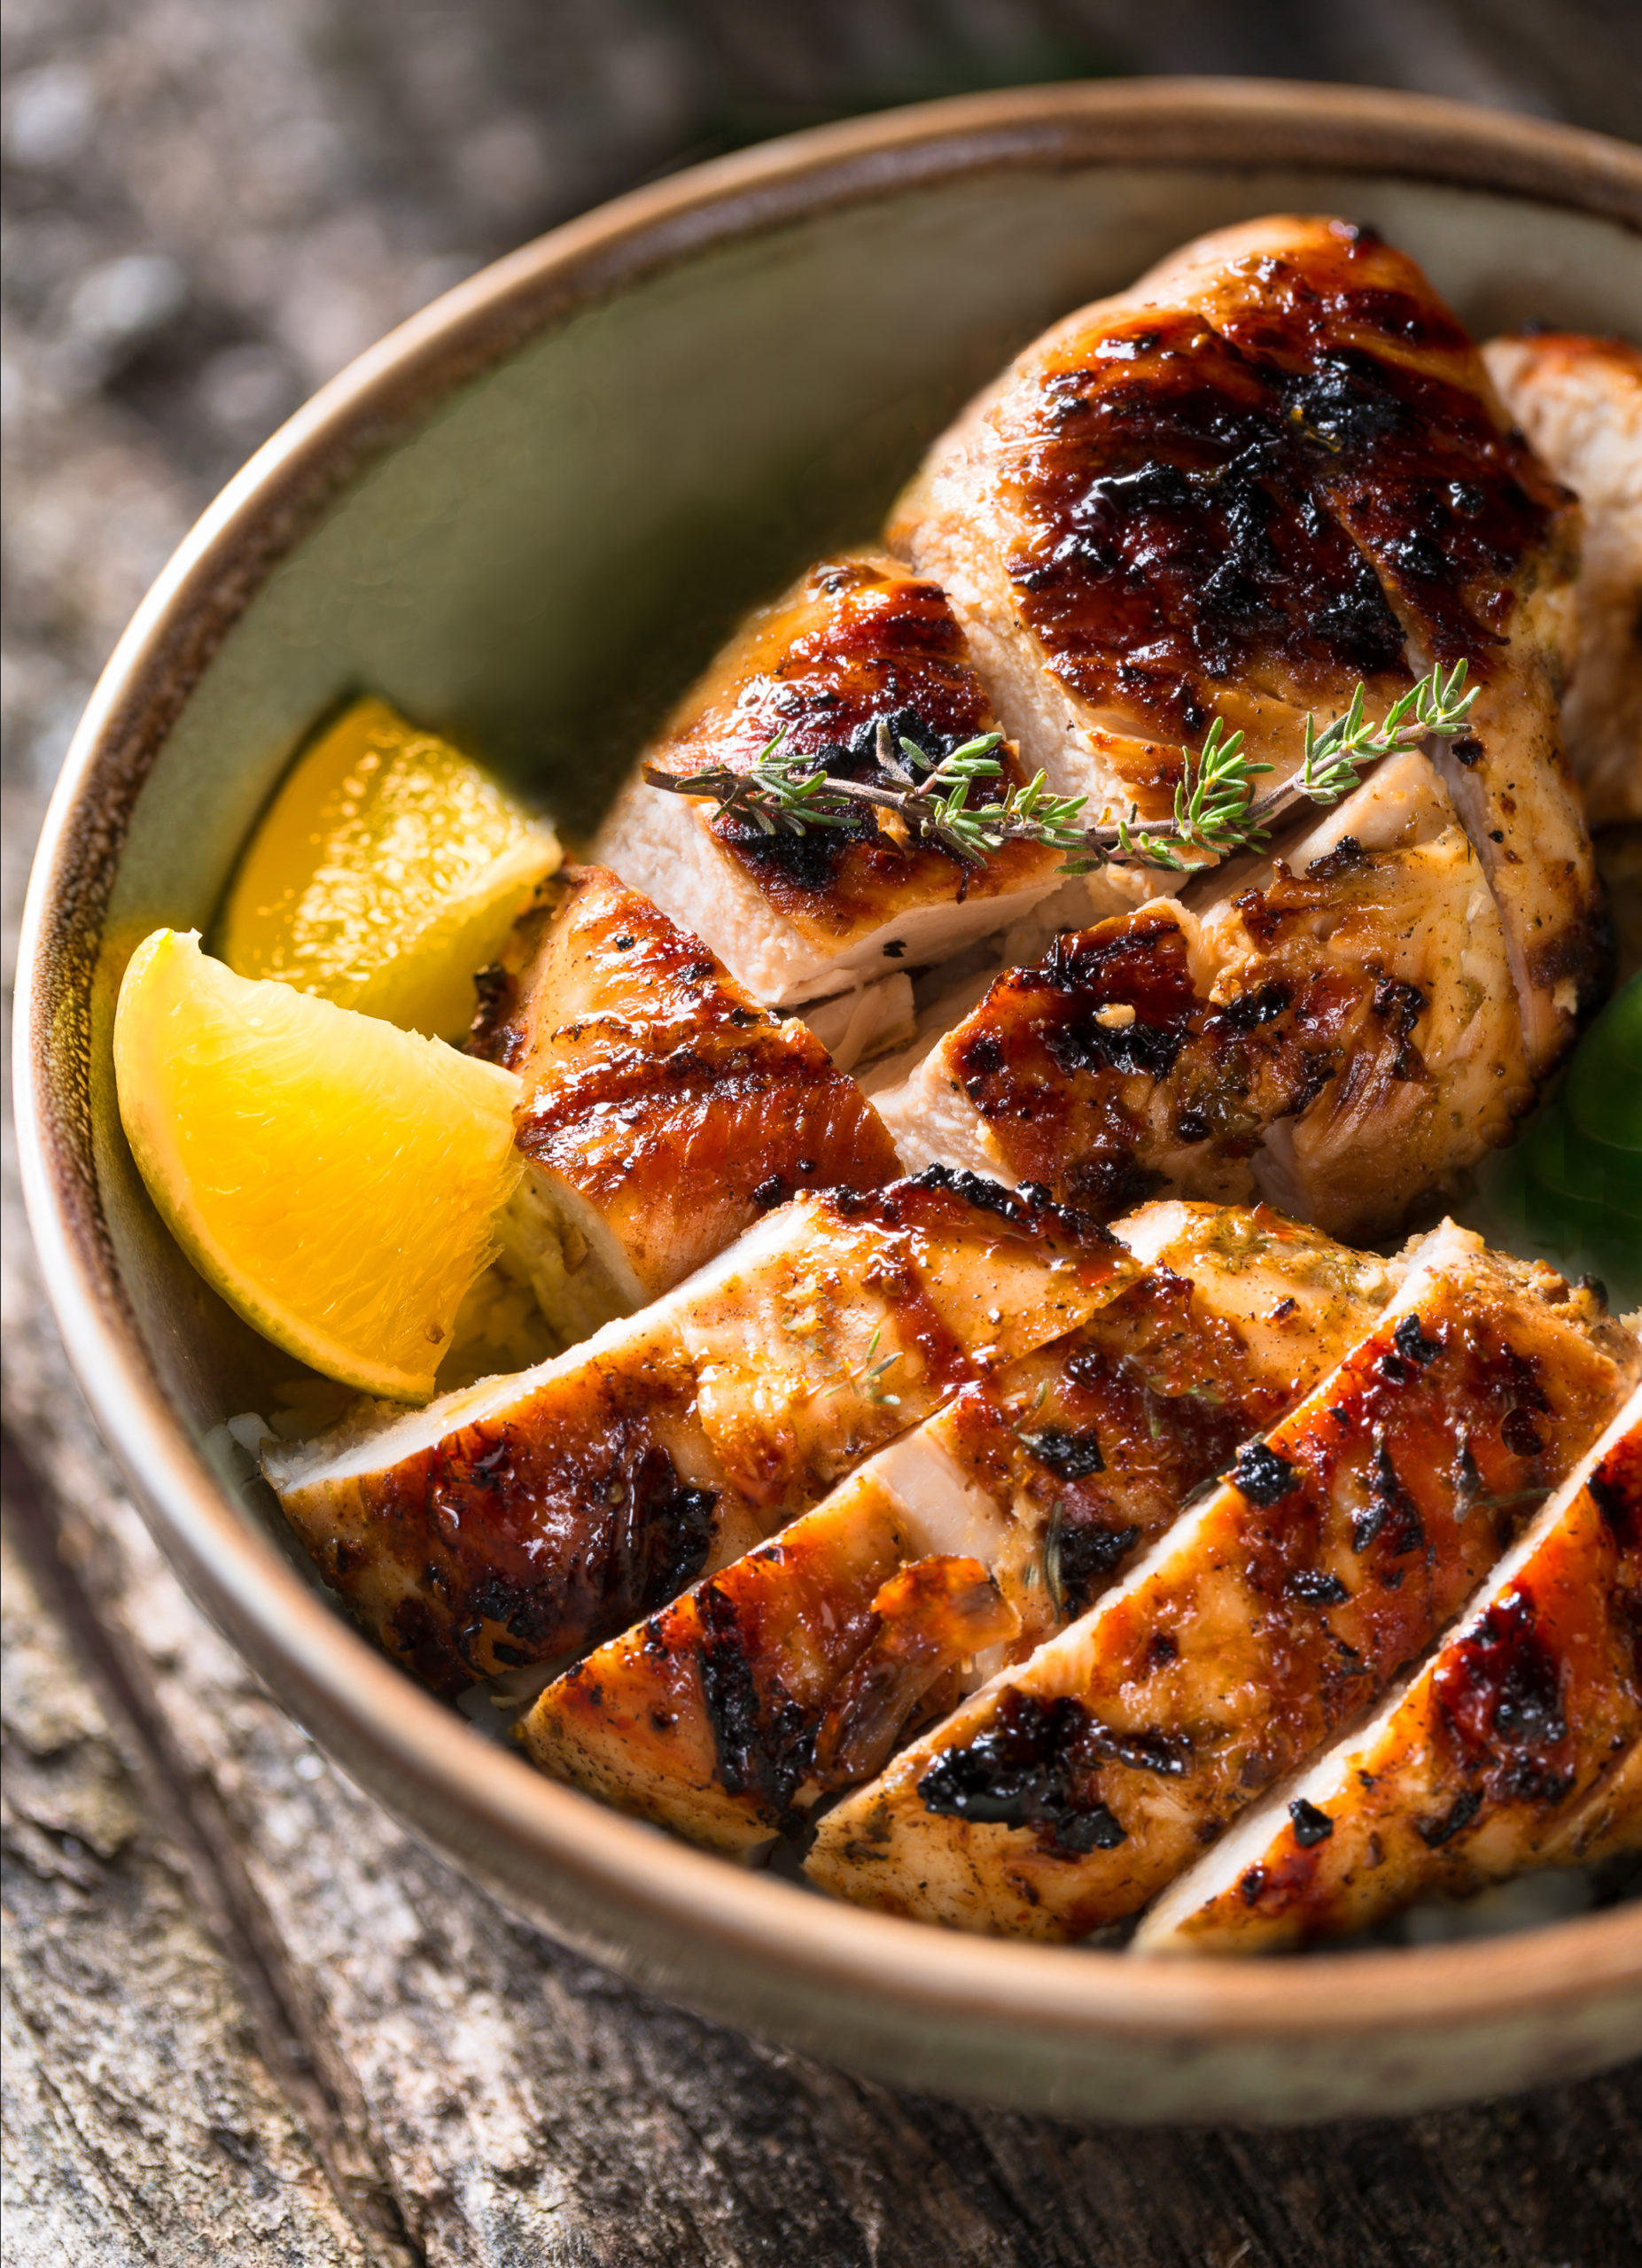
C. Techniques for grilling poultry
Grilling poultry, such as chicken and turkey, can result in juicy and flavorful meat with a crispy skin. Here are some techniques to help you achieve excellent results:
- Preheat your grill to medium-high heat and oil the grates to prevent sticking.
- Season the poultry with your favorite rub or marinade, ensuring that it is evenly coated.
- If grilling a whole bird, start with indirect heat by placing the poultry on the cooler side of the grill. This allows the meat to cook through without burning the skin.
- After the initial cooking, move the poultry to direct heat to crisp up the skin. Keep a close eye on it to prevent burning.
- Use a meat thermometer to ensure that the poultry reaches a safe internal temperature of 165°F (74°C).
- Let the grilled poultry rest for a few minutes before serving to allow the juices to redistribute.
- Serve the grilled poultry with your favorite sides and sauces, such as barbecue sauce or a tangy aioli.
D. Cooking steaks and burgers to perfection
Grilling steaks and burgers is a classic barbecue favorite. Follow these tips to achieve perfectly cooked meat:
- Choose high-quality cuts of beef, such as ribeye, sirloin, or ground chuck for burgers.
- Preheat your grill to high heat to create a sear on the meat.
- Season the steaks or burgers generously with salt, pepper, and any additional spices or herbs you prefer.
- Place the meat on the hot grill grates and cook it according to your desired level of doneness. Use a meat thermometer to ensure accuracy.
- For steaks, sear them for a few minutes on each side, then move them to indirect heat to finish cooking.
- For burgers, cook them for about 4-5 minutes per side for medium-rare, adjusting the time based on your preference.
- Let the steaks or burgers rest for a few minutes before serving to allow the juices to redistribute.
- Serve the grilled steaks or burgers with your favorite accompaniments, such as grilled onions, mushrooms, or a flavorful sauce.
E. Grilling ribs and other pork cuts
Grilling ribs and other pork cuts can result in tender, flavorful meat with a delicious smoky taste. Here are some techniques to help you grill pork to perfection:
- Choose the right type of ribs, such as baby back ribs or spare ribs, and pork cuts like pork chops or tenderloin.
- Preheat your grill to medium heat and oil the grates to prevent sticking.
- Season the ribs or pork cuts with a dry rub or marinade, allowing the flavors to penetrate the meat.
- For ribs, you can use the 2-2-1 method: grill them for 2 hours over indirect heat, wrap them in foil with a liquid (such as apple juice or beer), and grill for another 2 hours. Finish by grilling them uncovered for the final hour, basting with barbecue sauce.
- For pork chops or tenderloin, grill them over medium heat until they reach an internal temperature of 145°F (63°C).
- Let the grilled ribs or pork cuts rest for a few minutes before serving to allow the juices to settle.
- Serve the grilled ribs or pork cuts with your favorite barbecue sauce or a tangy glaze.
By following these grilling techniques for different foods, you can elevate your barbecue game and impress your family and friends with delicious and flavorful meals. Experiment with different seasonings and sauces to create your own signature dishes. Happy grilling!
IX. Smoking Techniques for Flavorful BBQ
When it comes to barbecue grilling, smoking techniques play a crucial role in infusing mouthwatering flavors into your meats. Whether you’re a seasoned pitmaster or a beginner, understanding the different smoking techniques and the types of wood chips to use can take your BBQ to the next level. In this section, we’ll explore the various smoking techniques, the best wood chips for different meats, and tips for controlling smoke and temperature.
A. Types of Wood Chips for Smoking
Choosing the right wood chips is essential for achieving the desired flavors in your BBQ. Different types of wood impart distinct flavors, so it’s important to match the wood chips with the type of meat you’re smoking. Here are some popular wood chips and the flavors they bring:
- Hickory: Known for its strong and smoky flavor, hickory wood chips are perfect for smoking beef, pork, and poultry. They add a robust and bacon-like taste to your BBQ.
- Mesquite: Mesquite wood chips are ideal for grilling and smoking red meats like beef and lamb. They provide a bold and slightly sweet flavor that pairs well with rich meats.
- Apple: If you’re smoking pork or poultry, apple wood chips are a great choice. They give a mild and slightly sweet flavor, adding a fruity aroma to your BBQ.
- Cherry: Cherry wood chips are versatile and work well with a variety of meats, including pork, poultry, and fish. They offer a mild and slightly sweet flavor with a hint of tartness.
- Pecan: Pecan wood chips are popular for smoking poultry, pork, and beef. They provide a rich and nutty flavor that enhances the natural taste of the meat.
Remember to soak the wood chips in water for at least 30 minutes before using them. This helps prevent them from burning too quickly and ensures a steady release of smoke during the smoking process.
B. Smoking Techniques for Different Meats
Each type of meat requires a specific smoking technique to achieve optimal tenderness and flavor. Here are some smoking techniques to consider for different meats:
- Brisket: Brisket is a popular cut for smoking, but it requires low and slow cooking. Start by seasoning the brisket with a dry rub, then smoke it at a temperature of around 225°F to 250°F for several hours. Wrap it in foil or butcher paper during the cooking process to retain moisture and enhance tenderness.
- Ribs: For tender and juicy ribs, use the 3-2-1 method. Smoke the ribs uncovered for 3 hours, then wrap them in foil with some liquid (such as apple juice or beer) for 2 hours to steam and tenderize. Finally, remove the foil and smoke them for another hour to develop a caramelized crust.
- Chicken: To achieve crispy skin and moist meat, smoke chicken at a higher temperature of around 275°F to 300°F. Use a flavorful marinade or dry rub to enhance the taste. You can also consider using a beer can chicken holder to infuse the meat with additional flavors.
- Pork Shoulder: Pork shoulder, also known as pork butt, is perfect for pulled pork. Smoke it at a temperature of around 225°F to 250°F until it reaches an internal temperature of 195°F to 205°F. This slow and low cooking method breaks down the collagen, resulting in tender and flavorful pulled pork.
C. Tips for Controlling Smoke and Temperature
Controlling smoke and temperature is crucial for achieving consistent and delicious results. Here are some tips to help you maintain the perfect smoking environment:
- Use a quality smoker: Invest in a reliable smoker that allows you to control the temperature easily. Whether you prefer a charcoal, electric, or pellet smoker, choose one that suits your needs and provides consistent heat.
- Manage airflow: Proper airflow is essential for maintaining the right temperature and smoke levels. Adjust the vents on your smoker to control the amount of oxygen and smoke inside.
- Monitor internal temperature: Use a meat thermometer to monitor the internal temperature of the meat. This ensures that it’s cooked to the desired level of doneness and avoids undercooking or overcooking.
- Add wood chips gradually: Instead of adding a large amount of wood chips at once, add them gradually throughout the smoking process. This helps maintain a steady release of smoke and prevents the meat from becoming overly smoky.
- Baste or mop the meat: Basting or mopping the meat with a flavorful liquid, such as a marinade or barbecue sauce, adds moisture and enhances the taste. Apply the basting liquid during the smoking process to keep the meat juicy.
By mastering the smoking techniques, choosing the right wood chips, and following these tips, you’ll be able to create flavorful and tender BBQ that will impress your family and friends. Experiment with different combinations of wood chips and meats to discover your favorite flavor profiles. Happy smoking!
Barbecue sauce and glazing are essential components of achieving the perfect grilled dish. Whether you’re a seasoned griller or just starting out, understanding the art of homemade barbecue sauce, applying sauce and glaze during grilling, and tips for achieving a perfect caramelized glaze will elevate your barbecue game to new heights. In this section, we will delve into these topics and provide you with expert insights and tips to enhance your grilling experience.
A. Homemade barbecue sauce recipes
When it comes to barbecue sauce, there is a wide range of flavors and styles to choose from. While store-bought options are readily available, nothing beats the satisfaction of making your own homemade barbecue sauce. Not only does it allow you to customize the flavors to your liking, but it also gives you the opportunity to experiment with different ingredients and create a sauce that is truly unique to your taste.
One popular homemade barbecue sauce recipe is the classic Kansas City style sauce. This sauce is known for its rich and tangy flavor profile, combining ingredients such as ketchup, brown sugar, vinegar, Worcestershire sauce, and various spices. The result is a thick and flavorful sauce that pairs well with a variety of grilled meats.
If you prefer a spicier kick, you can try a homemade chipotle barbecue sauce. This sauce incorporates chipotle peppers in adobo sauce, which adds a smoky and spicy element to the traditional barbecue sauce. The combination of sweetness, tanginess, and heat creates a bold and complex flavor that will tantalize your taste buds.
For those looking for a healthier alternative, a homemade honey mustard barbecue sauce is a great option. This sauce combines the sweetness of honey with the tanginess of mustard, resulting in a lighter and more refreshing flavor. It is perfect for glazing grilled chicken or drizzling over vegetables.
Remember, the key to a successful homemade barbecue sauce is balance. Experiment with different ingredients, adjust the quantities to suit your taste, and don’t be afraid to get creative. The possibilities are endless, and you may discover your own signature barbecue sauce along the way.
B. Applying sauce and glaze during grilling
Once you have prepared your homemade barbecue sauce, the next step is to apply it to your grilled meats. Properly applying sauce and glaze during grilling is crucial to achieving a flavorful and well-cooked dish.
First and foremost, timing is everything. It is important to apply the sauce at the right moment to prevent it from burning or becoming too sticky. For most meats, it is recommended to start applying the sauce during the last 10-15 minutes of grilling. This allows the sauce to caramelize and create a delicious glaze without overcooking the meat.
When applying the sauce, use a basting brush or a mop to evenly distribute it on the meat’s surface. Be generous with the sauce, but avoid applying too much at once, as it can cause flare-ups and result in uneven cooking. Instead, apply multiple thin layers of sauce, allowing each layer to set before applying the next one.
For a more intense flavor, you can also marinate the meat in the barbecue sauce before grilling. This will infuse the flavors into the meat and create a deeper, more complex taste. Simply place the meat in a resealable bag or a shallow dish, pour the sauce over it, and let it marinate in the refrigerator for a few hours or overnight.
Remember to reserve some sauce for serving. Grilled meats are often served with a side of barbecue sauce for dipping or drizzling. This allows each individual to customize the amount of sauce according to their preference.
C. Tips for achieving a perfect caramelized glaze
One of the hallmarks of a well-grilled dish is a perfectly caramelized glaze. Achieving this golden, sticky, and flavorful crust requires a combination of technique and attention to detail. Here are some tips to help you achieve that coveted caramelized glaze:
- Preheat your grill: Before grilling, make sure your grill is preheated to the appropriate temperature. This ensures that the meat cooks evenly and allows the sauce to caramelize properly.
- Oil the grill grates: To prevent the meat from sticking to the grill grates, lightly oil them before placing the meat on the grill. This will also help create those beautiful grill marks.
- Apply the sauce at the right time: As mentioned earlier, timing is crucial when applying the sauce. Wait until the meat is almost cooked before applying the sauce to prevent it from burning.
- Use indirect heat: If you’re grilling larger cuts of meat or meats that require longer cooking times, consider using indirect heat. This involves placing the meat on the cooler side of the grill and closing the lid. This allows the meat to cook through without burning the sauce.
- Baste and flip: While grilling, baste the meat with the sauce and flip it regularly to ensure even cooking and caramelization. This will help create a uniform glaze on all sides of the meat.
- Monitor the temperature: Use a meat thermometer to monitor the internal temperature of the meat. This will help you determine when it is cooked to your desired level of doneness.
By following these tips and techniques, you will be able to achieve a perfect caramelized glaze that not only adds flavor but also enhances the visual appeal of your grilled dishes.
Barbecue sauce and glazing are integral parts of the grilling experience. Whether you prefer a tangy Kansas City-style sauce, a spicy chipotle barbecue sauce, or a lighter honey mustard sauce, making your own homemade barbecue sauce allows you to customize the flavors to your liking. When applying the sauce and glaze during grilling, timing and technique are key to achieving a flavorful and well-cooked dish. Finally, mastering the art of caramelizing the glaze requires attention to detail and following a few simple tips. With these insights and techniques, you can take your barbecue game to the next level and impress your family and friends with delicious, perfectly grilled dishes.

William Black is a seasoned wordsmith with a passion for crafting compelling content. Hailing from the vibrant city of Seattle, he has honed his writing skills through years of experience in the field. William holds a Bachelor’s degree in English Literature from the prestigious University of Washington, where he developed a deep appreciation for the power of storytelling. His educational background has equipped him with a keen eye for detail and a strong command of the English language. With a particular expertise in SEO writing, William effortlessly weaves keywords into his prose, ensuring maximum visibility and engagement. When he’s not busy crafting captivating content, you can find William exploring the local food scene, indulging in his love for all things culinary.