Contents
- I. Introduction
- II. Benefits of Poaching
- III. Essential Equipment for Poaching
- IV. Step-by-Step Guide to Poaching Delicate Foods
- V. Tips and Tricks for Perfect Poaching
- VI. Poaching Techniques for Different Foods
- VII. Troubleshooting Common Poaching Issues
- VIII. Best Poaching Recipes for Delicate Foods
- IX. Top Poaching Tools and Equipment on the Market
I. Introduction

Welcome to “Poaching Perfection: Gentle Cooking for Delicate Foods,” where we explore the art of poaching and its benefits for cooking delicate ingredients. Poaching is a cooking technique that involves gently simmering food in liquid, resulting in tender and flavorful dishes. Whether you’re a seasoned chef or a home cook looking to elevate your culinary skills, this article will provide you with valuable insights and tips to master the art of poaching.
In this comprehensive guide, we will delve into the intricacies of poaching, covering everything from the basics to advanced techniques. We will explore the various types of foods that can be poached, including fish, poultry, eggs, and fruits. Additionally, we will discuss the different liquids and flavorings that can be used for poaching, as well as the equipment needed to achieve optimal results.
Throughout the article, we will emphasize the importance of maintaining the perfect poaching temperature and timing to ensure that your delicate ingredients are cooked to perfection. We will also address common challenges that may arise during the poaching process and provide troubleshooting tips to overcome them.
Whether you’re looking to prepare a tender poached salmon fillet, a perfectly poached egg for your eggs Benedict, or a refreshing poached fruit dessert, this article will equip you with the knowledge and techniques needed to achieve poaching perfection. So, let’s dive in and unlock the secrets of gentle cooking for delicate foods!
II. Benefits of Poaching
Poaching is a gentle cooking method that offers numerous benefits, especially when it comes to delicate foods. Whether you’re preparing fish, poultry, or vegetables, poaching helps retain moisture and tenderness, preserves natural flavors and nutrients, and provides versatility in cooking various types of delicate foods.
A. Retains Moisture and Tenderness in Delicate Foods
One of the key advantages of poaching is its ability to retain moisture and tenderness in delicate foods. When you poach food, you cook it in a liquid, such as water, broth, or wine, at a low and steady temperature. This gentle cooking process helps to prevent the food from drying out, ensuring that it remains juicy and succulent.
For example, when poaching fish, the liquid helps to keep the flesh moist and prevents it from becoming tough or rubbery. The delicate texture of the fish is preserved, resulting in a melt-in-your-mouth experience. Similarly, when poaching chicken or other poultry, the liquid helps to keep the meat moist and tender, making it a popular cooking method for dishes like chicken soup or chicken salad.
B. Preserves Natural Flavors and Nutrients
Another benefit of poaching is that it helps to preserve the natural flavors and nutrients of delicate foods. Unlike other cooking methods that may require the use of oils, fats, or high heat, poaching allows the natural flavors of the food to shine through.
When you poach food, the gentle heat of the liquid helps to extract and infuse flavors into the food without overpowering it. This means that the delicate flavors of the ingredients are preserved, resulting in a dish that is both flavorful and subtle.
In addition to preserving flavors, poaching also helps to retain the nutritional value of the food. Since the food is cooked in liquid rather than oil or fat, there is minimal loss of vitamins and minerals during the cooking process. This makes poaching a healthy cooking method that allows you to enjoy the full nutritional benefits of the ingredients.
C. Versatility in Cooking Various Types of Delicate Foods
Poaching is a versatile cooking method that can be used to prepare a wide range of delicate foods. From fish and seafood to poultry, eggs, and even fruits and vegetables, poaching offers a gentle and effective way to cook these ingredients.
For example, when poaching fish, you can experiment with different types of fish, such as salmon, cod, or tilapia, and vary the flavors by using different liquids and seasonings. Poaching is also a popular method for cooking eggs, whether you’re making poached eggs for breakfast or using them as a topping for salads or sandwiches.
Furthermore, poaching can be used to cook fruits, such as pears or peaches, in a flavorful syrup, resulting in a delicious and elegant dessert. Vegetables, such as asparagus or artichokes, can also be poached to enhance their natural flavors and maintain their crispness.
III. Essential Equipment for Poaching

When it comes to achieving poaching perfection, having the right equipment is crucial. In this section, we will explore the essential tools you need to ensure a successful poaching experience.
A. Choosing the right pot for poaching
The first step in achieving poaching perfection is selecting the right pot. When choosing a pot for poaching, there are a few key factors to consider:
- Material: Opt for pots made of stainless steel or enameled cast iron. These materials distribute heat evenly, ensuring that your delicate foods cook gently and uniformly.
- Size: Choose a pot that is large enough to accommodate the food you are poaching without overcrowding. This allows the food to cook evenly and ensures that the poaching liquid covers the food completely.
- Depth: Look for a pot with sufficient depth to hold an ample amount of poaching liquid. This helps maintain the desired temperature and prevents the liquid from evaporating too quickly.
By considering these factors, you can select a pot that provides optimal heat distribution, capacity, and depth for your poaching needs.
B. Selecting the appropriate poaching liquid
The choice of poaching liquid can greatly impact the flavor and texture of your poached foods. Here are a few options to consider:
- Broth: Using a flavorful broth, such as chicken, vegetable, or fish, can infuse your poached foods with delicious taste. The broth adds depth and enhances the natural flavors of the ingredients.
- Wine: Adding wine to your poaching liquid can impart a subtle, sophisticated flavor to your dish. White wine pairs well with delicate fish and poultry, while red wine complements heartier meats.
- Herbs and Spices: Experimenting with herbs and spices can elevate the flavor profile of your poached foods. Consider adding aromatics like bay leaves, thyme, rosemary, or peppercorns to infuse the liquid with enticing aromas.
Remember to season your poaching liquid with salt to enhance the overall taste of your dish. The poaching liquid should be flavorful but not overpowering, allowing the natural flavors of the ingredients to shine through.
C. Temperature control tools for precise cooking
Temperature control is essential when it comes to achieving poaching perfection. Here are a few tools that can help you maintain precise cooking temperatures:
- Thermometer: A reliable food thermometer is a must-have tool for poaching. It allows you to monitor the temperature of the poaching liquid and ensures that it stays within the desired range. This helps prevent undercooking or overcooking your food.
- Sous Vide Machine: For those who want to take their poaching skills to the next level, a sous vide machine is a game-changer. This device allows you to precisely control the water temperature, ensuring consistent and precise cooking results.
- Timer: Using a timer is essential to keep track of the poaching time. Different foods require different cooking times, and overcooking can lead to dry and tough results. Set a timer to ensure that your food is cooked to perfection.
By utilizing these temperature control tools, you can achieve the ideal cooking temperatures for your poached foods, resulting in tender, succulent, and perfectly cooked dishes.
IV. Step-by-Step Guide to Poaching Delicate Foods
Poaching is a gentle cooking method that involves submerging delicate foods in a flavorful liquid. It’s a great technique to use when you want to retain the natural flavors and textures of ingredients such as fish, eggs, or fruits. In this step-by-step guide, I will walk you through the process of poaching delicate foods to perfection.
A. Preparing the food for poaching
The first step in poaching delicate foods is to properly prepare them. Start by selecting the freshest ingredients available. For fish, make sure it is scaled, gutted, and filleted. For eggs, crack them into a separate bowl to ensure no shell fragments end up in the poaching liquid. For fruits, wash and remove any stems or leaves.
Once your ingredients are ready, season them with salt and pepper or any other desired spices. This will enhance the flavors of the final dish. You can also marinate the ingredients in a mixture of herbs, spices, and citrus juices for added flavor.
B. Preparing the poaching liquid
The poaching liquid is what infuses the delicate foods with flavor during the cooking process. To prepare the poaching liquid, start by choosing a base such as water, broth, wine, or a combination of these. The liquid should be enough to fully submerge the ingredients.
Add aromatics such as onions, garlic, herbs, and spices to the poaching liquid. This will impart additional flavors to the delicate foods. You can also add a splash of vinegar or lemon juice to help tenderize the ingredients and prevent them from falling apart.
Bring the poaching liquid to a gentle simmer over medium heat. Avoid boiling the liquid, as this can cause the delicate foods to become tough or overcooked.
C. Bringing the poaching liquid to the correct temperature
The key to successful poaching is maintaining the correct temperature of the poaching liquid. The ideal temperature for poaching delicate foods is between 160°F (71°C) and 180°F (82°C).
Use a kitchen thermometer to monitor the temperature of the poaching liquid. Adjust the heat as necessary to maintain a gentle simmer. If the liquid gets too hot, remove it from the heat and let it cool slightly before continuing.
D. Adding the food to the poaching liquid
Once the poaching liquid has reached the correct temperature, carefully add the prepared ingredients. Place them gently into the liquid, making sure they are fully submerged. Avoid overcrowding the pot, as this can lead to uneven cooking.
Allow the delicate foods to poach in the liquid for the recommended cooking time. The cooking time will vary depending on the type and size of the ingredients. Fish fillets may take around 5-10 minutes, while eggs may take 3-4 minutes for a soft poach.
E. Monitoring the cooking process
While the delicate foods are poaching, it’s important to monitor the cooking process to ensure they are cooked to perfection. Keep an eye on the temperature of the poaching liquid and adjust the heat as needed to maintain a gentle simmer.
Use a slotted spoon or tongs to gently turn the ingredients halfway through the cooking time. This will help ensure even cooking and prevent them from sticking to the bottom of the pot.
F. Removing the food from the poaching liquid
Once the delicate foods are cooked to your desired level of doneness, carefully remove them from the poaching liquid. Use a slotted spoon or tongs to lift them out, allowing any excess liquid to drain off.
Transfer the poached foods to a serving plate or dish. You can serve them immediately while they are still warm, or let them cool and refrigerate for later use.
Remember, poaching is a versatile cooking technique that can be used for a variety of delicate foods. Experiment with different ingredients and flavors to create your own poaching masterpieces. With practice and attention to detail, you’ll soon become a pro at poaching delicate foods to perfection.
V. Tips and Tricks for Perfect Poaching
When it comes to achieving poaching perfection, there are several key factors to consider. From choosing the right cooking time to enhancing flavors with aromatics and seasonings, these tips and tricks will help you elevate your poaching game. Let’s dive in!
A. Choosing the right cooking time for different foods
One of the most important aspects of poaching is determining the correct cooking time for different types of foods. Whether you’re poaching eggs, fish, or poultry, the cooking time can vary significantly. It’s crucial to understand the desired level of doneness for each food item and adjust the cooking time accordingly.
For example, when poaching eggs, you’ll want to achieve a perfectly runny yolk while ensuring the whites are fully set. This typically requires a cooking time of around 3-4 minutes. On the other hand, when poaching fish, you’ll want to cook it until it flakes easily with a fork, which usually takes around 8-10 minutes, depending on the thickness of the fillet.
Experimenting with different cooking times and keeping a close eye on the food as it cooks will help you achieve the desired results. Remember, practice makes perfect!
B. Enhancing flavors with aromatics and seasonings
While poaching is a gentle cooking method that preserves the natural flavors of the food, adding aromatics and seasonings can take it to the next level. Aromatics such as herbs, spices, and vegetables infuse the poaching liquid with their flavors, imparting a subtle yet delightful taste to the food.
For example, when poaching chicken, you can add a bundle of fresh herbs like thyme, rosemary, and bay leaves to the poaching liquid. This will infuse the chicken with a fragrant aroma and enhance its overall taste. Similarly, when poaching fish, you can add slices of lemon, garlic cloves, and a sprinkle of black peppercorns to elevate the flavors.
Experiment with different combinations of aromatics and seasonings to create unique flavor profiles that complement the food you’re poaching. Don’t be afraid to get creative and let your taste buds guide you!
C. Adding acid or salt to the poaching liquid for flavor balance
Another way to enhance the flavors of poached foods is by balancing the taste with acid or salt. Adding a splash of acid, such as vinegar or citrus juice, to the poaching liquid can help brighten the flavors and cut through any richness.
For example, when poaching eggs, adding a tablespoon of white vinegar to the simmering water can help the eggs coagulate faster and prevent them from spreading too much. The vinegar also adds a subtle tanginess to the eggs, balancing their richness.
Similarly, when poaching seafood like shrimp or lobster, adding a pinch of salt to the poaching liquid can enhance the natural flavors of the shellfish. The salt helps draw out the moisture, resulting in a more succulent and flavorful end product.
Remember to taste the poaching liquid before adding the food to ensure it has the right balance of flavors. Adjust the amount of acid or salt accordingly to achieve the desired taste.
D. Using a thermometer for precise temperature control
Temperature control is crucial when it comes to poaching delicate foods. Using a thermometer allows you to monitor the temperature of the poaching liquid and ensure it stays within the desired range.
For example, when poaching chicken, the ideal internal temperature should reach 165°F (74°C) to ensure it’s fully cooked and safe to eat. By using a thermometer, you can accurately gauge the doneness of the chicken without overcooking it.
Similarly, when poaching fish, maintaining a temperature of around 140-145°F (60-63°C) ensures that the fish cooks gently and retains its moisture and tenderness.
A thermometer provides precise temperature readings, eliminating any guesswork and ensuring consistent results every time you poach. Invest in a reliable thermometer and let it be your guide to poaching perfection.
With these tips and tricks in your culinary arsenal, you’ll be well-equipped to achieve poaching perfection. Remember to experiment, trust your instincts, and most importantly, enjoy the process of creating delicious and delicate poached dishes!
VI. Poaching Techniques for Different Foods
Poaching is a gentle cooking method that involves submerging food in a liquid and cooking it at a low temperature. This technique is perfect for delicate foods, as it helps to retain their natural flavors and textures. In this section, we will explore various poaching techniques for different types of foods, including delicate fish fillets, eggs, tender fruits, and poultry.
A. Poaching delicate fish fillets
Poaching delicate fish fillets requires a delicate touch to ensure that the fish remains tender and moist. Here’s a step-by-step guide to poaching fish fillets:
- Choose a flavorful poaching liquid: Start by selecting a poaching liquid that complements the flavor of the fish. You can use a combination of water, white wine, lemon juice, and herbs to create a fragrant and flavorful liquid.
- Prep the fish fillets: Pat the fish fillets dry with a paper towel and season them with salt and pepper. This will enhance the flavor of the fish.
- Heat the poaching liquid: Pour the poaching liquid into a wide, shallow pan and bring it to a gentle simmer over medium heat. Make sure the liquid is enough to cover the fish fillets.
- Add the fish fillets: Carefully place the fish fillets into the poaching liquid, making sure they are fully submerged. Avoid overcrowding the pan to ensure even cooking.
- Poach the fish: Reduce the heat to low and let the fish gently poach for about 8-10 minutes, or until the fillets are opaque and flake easily with a fork.
- Remove the fish fillets: Using a slotted spatula, carefully remove the poached fish fillets from the liquid and transfer them to a plate lined with paper towels to drain excess liquid.
Poached fish fillets can be served hot or cold, depending on your preference. They are delicious when served with a light sauce or a squeeze of lemon juice.
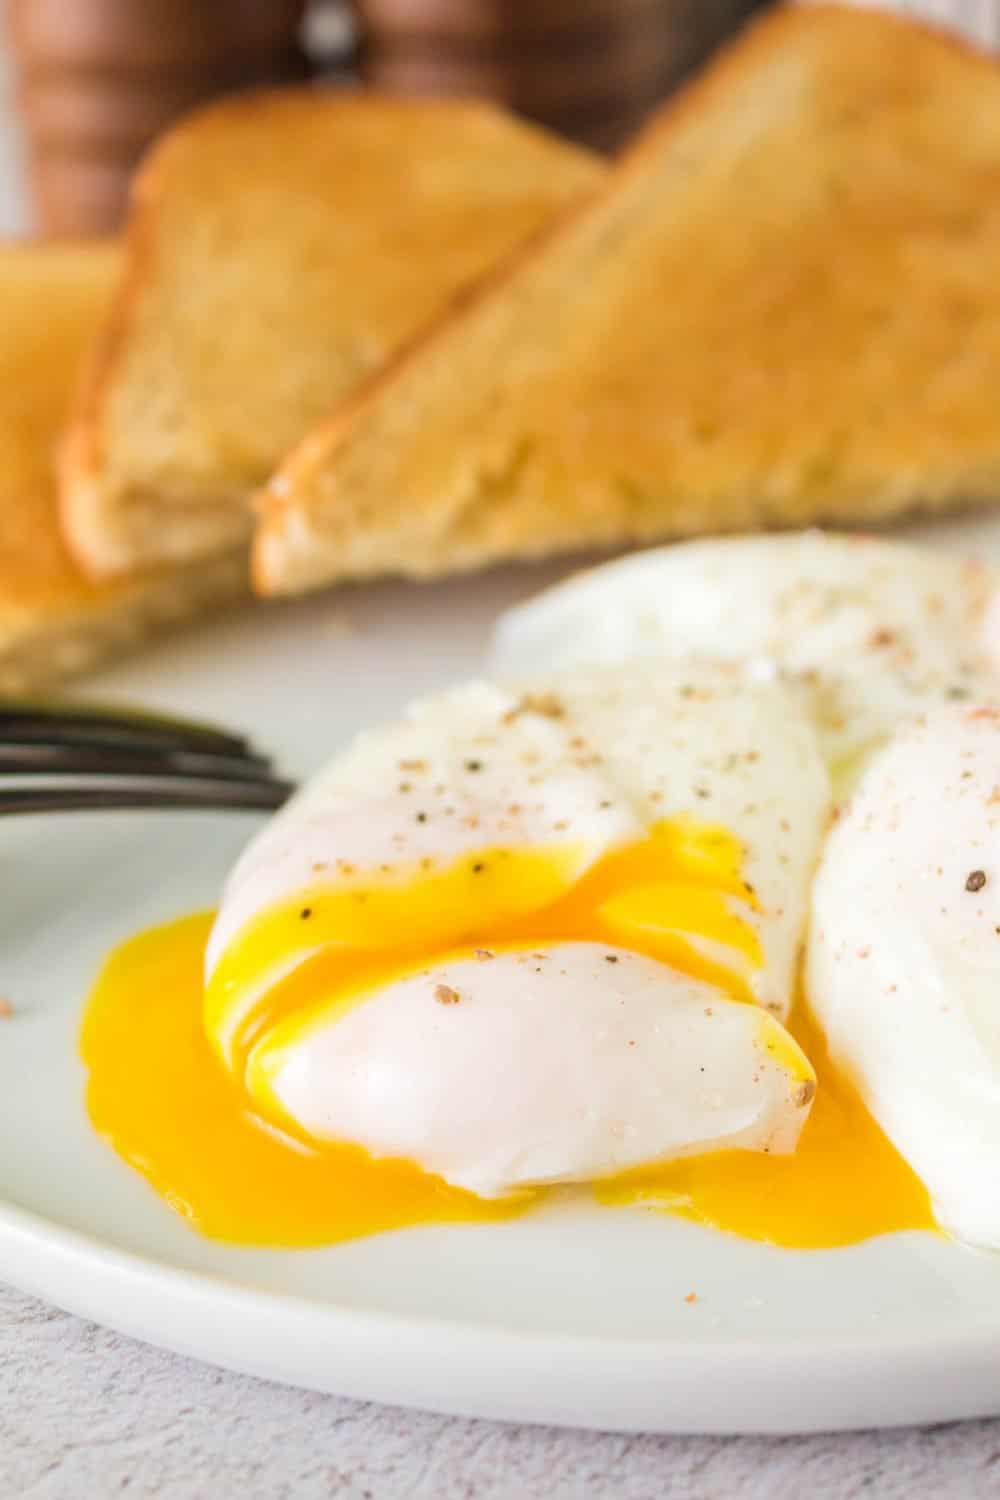
B. Poaching eggs for a perfect breakfast
Poached eggs are a classic breakfast dish that can be enjoyed on their own or as a topping for various dishes like eggs Benedict or avocado toast. Here’s how to poach eggs to perfection:
- Choose fresh eggs: Fresh eggs are essential for poaching. They hold their shape better and have a richer flavor. Make sure the eggs are at room temperature before poaching.
- Prepare the poaching liquid: Fill a wide, shallow pan with water and bring it to a gentle simmer. Add a splash of vinegar to the water, which helps the egg whites coagulate faster.
- Crack the eggs: Crack each egg into a small bowl or ramekin. This will make it easier to slide the eggs into the poaching liquid.
- Create a whirlpool: Using a spoon, create a gentle whirlpool in the simmering water. This will help the eggs retain their shape and prevent them from spreading too much.
- Slide the eggs into the water: One at a time, carefully slide the cracked eggs into the center of the whirlpool. The swirling motion of the water will help the eggs form a neat shape.
- Poach the eggs: Let the eggs poach for about 3-4 minutes, or until the whites are set but the yolks are still slightly runny. Use a slotted spoon to carefully lift the poached eggs out of the water.
Poached eggs can be served on their own or paired with toast, bacon, or sautéed vegetables for a delicious and satisfying breakfast.
C. Poaching tender fruits for desserts
Poaching tender fruits is a wonderful way to enhance their natural sweetness and create a delicious dessert. Here’s how to poach fruits for a delightful treat:
- Select ripe fruits: Choose fruits that are ripe but still firm, such as pears, peaches, or plums. Peel and core the fruits, if necessary.
- Prepare the poaching liquid: In a saucepan, combine water, sugar, and flavorings like vanilla extract, cinnamon sticks, or citrus zest. Bring the liquid to a simmer, stirring until the sugar dissolves.
- Add the fruits: Carefully add the prepared fruits to the poaching liquid, making sure they are fully submerged. Simmer the fruits gently until they are tender but still hold their shape.
- Remove the fruits: Using a slotted spoon, transfer the poached fruits to a serving dish. Let them cool slightly before serving.
Poached fruits can be enjoyed on their own or served with a dollop of whipped cream, a scoop of ice cream, or a drizzle of caramel sauce for a delightful dessert.
D. Poaching poultry for a juicy result
Poaching poultry, such as chicken or turkey, is a great way to ensure a juicy and flavorful result. Here’s how to poach poultry to perfection:
- Prepare the poaching liquid: In a large pot, combine water, aromatics like onions, carrots, celery, and herbs. Bring the liquid to a simmer and let the flavors infuse for about 10 minutes.
- Add the poultry: Carefully place the poultry pieces into the poaching liquid, making sure they are fully submerged. If using bone-in pieces, make sure the bones are covered with liquid.
- Poach the poultry: Reduce the heat to low and let the poultry gently poach for about 20-30 minutes, or until the meat is cooked through and no longer pink.
- Check for doneness: To ensure the poultry is cooked, insert a meat thermometer into the thickest part of the meat. It should register at least 165°F (74°C).
- Remove the poultry: Using tongs or a slotted spoon, carefully remove the poached poultry from the liquid and transfer it to a cutting board. Let it rest for a few minutes before serving.
Poached poultry can be served hot or cold, depending on your preference. It can be enjoyed on its own or used in various dishes like salads, sandwiches, or soups.
With these poaching techniques, you can create delicious and tender dishes using delicate fish fillets, eggs, tender fruits, and poultry. Experiment with different flavors and ingredients to add your own unique twist to these poached creations. Happy cooking!
VII. Troubleshooting Common Poaching Issues
A. Overcooking or undercooking the food
One of the most common issues when poaching food is overcooking or undercooking. Achieving the perfect level of doneness can be tricky, but with a few tips, you can avoid this problem.
Firstly, make sure to monitor the temperature of the poaching liquid. If the liquid is too hot, it can lead to overcooking. On the other hand, if the liquid is not hot enough, the food may be undercooked. Use a thermometer to check the temperature regularly and adjust the heat accordingly.
Additionally, it’s important to consider the size and thickness of the food being poached. Thicker cuts will require more time to cook, while thinner cuts will cook faster. Keep an eye on the food and test for doneness by gently pressing on it with a fork. If it feels firm and springs back, it’s likely cooked through.
Lastly, avoid overcrowding the poaching liquid. If there are too many pieces of food in the pot, they may not cook evenly. Give each piece enough space to cook properly and adjust the cooking time accordingly.
B. Preventing the poaching liquid from boiling
Another common issue when poaching is the poaching liquid boiling instead of simmering. This can result in uneven cooking and a less delicate texture. To prevent this, there are a few steps you can take.
Firstly, start with cold or room temperature liquid. Adding the food to hot liquid can cause it to boil. Slowly heat the liquid until it reaches a gentle simmer. This will ensure that the food cooks evenly and retains its delicate texture.
Next, keep an eye on the heat. If the liquid starts to boil, reduce the heat immediately. Adjust the heat as needed to maintain a gentle simmer throughout the poaching process.
Additionally, using a heavy-bottomed pot can help distribute the heat evenly and prevent the liquid from boiling. The heavy bottom will provide more insulation and help maintain a consistent temperature.
C. Avoiding the food from falling apart during poaching
When poaching delicate foods, such as fish or eggs, it’s important to prevent them from falling apart during the cooking process. Here are some tips to help you avoid this issue.
Firstly, handle the food with care when placing it in the poaching liquid. Delicate foods can easily break apart, so use a slotted spoon or spatula to gently lower them into the liquid. Avoid dropping or tossing the food, as this can cause it to break apart.
Next, make sure the poaching liquid is at the right temperature. If the liquid is too hot, it can cause the food to cook too quickly and fall apart. Maintain a gentle simmer and monitor the temperature closely.
Furthermore, avoid overcooking the food. Delicate foods can become fragile when cooked for too long. Keep a close eye on the cooking time and remove the food from the poaching liquid as soon as it is cooked through.
Lastly, consider using a poaching rack or a piece of cheesecloth to support the food while it cooks. This can help prevent it from falling apart and maintain its shape.
By following these troubleshooting tips, you can overcome common poaching issues and achieve poaching perfection for delicate foods.
VIII. Best Poaching Recipes for Delicate Foods
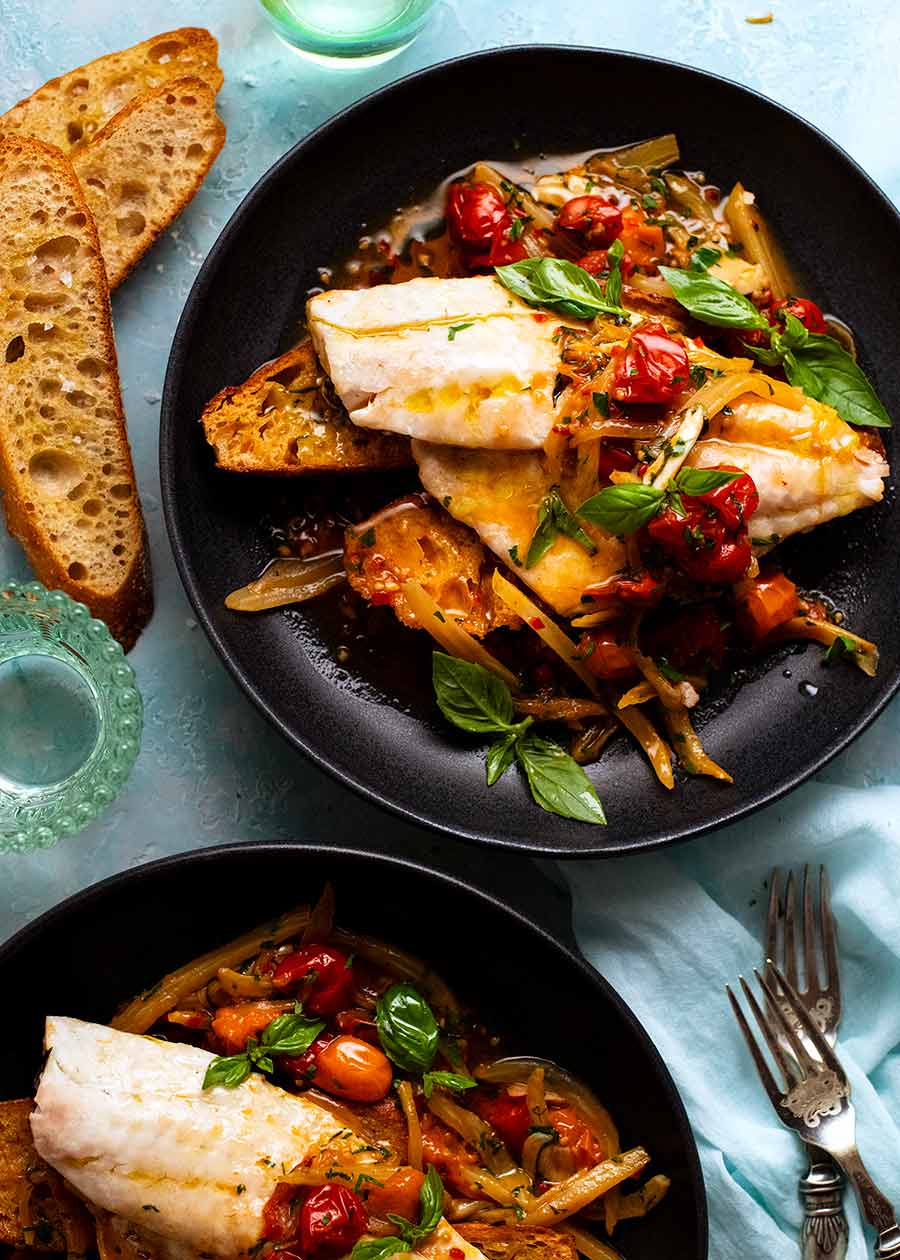
A. Poached salmon with dill and lemon
One of my all-time favorite recipes for delicate foods is poached salmon with dill and lemon. This dish is not only incredibly delicious but also very easy to prepare. The gentle cooking method of poaching ensures that the salmon remains tender and moist, while the combination of dill and lemon adds a burst of fresh flavors.
To make this dish, start by preparing a poaching liquid. In a large pot, combine water, white wine, lemon juice, and a few sprigs of fresh dill. Bring the liquid to a simmer and let it infuse for a few minutes. Then, carefully place the salmon fillets into the pot, making sure they are fully submerged in the liquid.
Cover the pot with a lid and let the salmon poach for about 10-12 minutes, or until it is cooked through. The exact cooking time will depend on the thickness of the fillets. Once the salmon is done, carefully remove it from the poaching liquid and transfer it to a serving platter.
To serve, garnish the poached salmon with fresh dill sprigs and lemon slices. You can also drizzle some of the poaching liquid over the fish for added flavor. This dish pairs well with steamed vegetables or a light salad.
B. Perfectly poached eggs Benedict
If you’re a fan of brunch, then you must try my recipe for perfectly poached eggs Benedict. This classic dish features poached eggs, Canadian bacon, and hollandaise sauce served on a toasted English muffin. The key to achieving poaching perfection with the eggs is to use fresh eggs and a gentle cooking technique.
To poach the eggs, fill a large pot with water and bring it to a gentle simmer. Add a splash of vinegar to the water, which helps the eggs hold their shape. Crack each egg into a small bowl or ramekin, then carefully slide it into the simmering water. Cook the eggs for about 3-4 minutes, or until the whites are set but the yolks are still runny.
While the eggs are poaching, prepare the other components of the dish. Toast the English muffins until golden brown, cook the Canadian bacon until crispy, and make the hollandaise sauce from scratch. Once everything is ready, assemble the eggs Benedict by placing a poached egg on top of each toasted muffin half, followed by a slice of Canadian bacon. Spoon the hollandaise sauce over the eggs and garnish with a sprinkle of fresh herbs, such as chives or parsley.
C. Poached pears in red wine sauce
For a delightful dessert option, I highly recommend trying poached pears in red wine sauce. This elegant and flavorful dessert is perfect for special occasions or when you want to impress your guests.
To make this dish, start by peeling and coring the pears, leaving the stems intact. In a large saucepan, combine red wine, sugar, cinnamon sticks, and a few cloves. Bring the mixture to a simmer and add the pears. Make sure the pears are fully submerged in the liquid, then cover the saucepan and let them poach for about 20-30 minutes, or until they are tender when pierced with a fork.
Once the pears are cooked, carefully remove them from the poaching liquid and transfer them to a serving dish. Continue simmering the liquid until it reduces and thickens into a syrupy sauce. Pour the sauce over the poached pears and let them cool slightly before serving.
This dessert can be enjoyed on its own or served with a scoop of vanilla ice cream or a dollop of whipped cream. The combination of the tender poached pears and the rich red wine sauce is simply divine.
D. Tender poached chicken with herbs
When it comes to cooking chicken, poaching is an excellent method to ensure that the meat stays tender and juicy. My recipe for tender poached chicken with herbs is a versatile dish that can be used in various recipes, such as salads, sandwiches, or pasta dishes.
To poach the chicken, place boneless, skinless chicken breasts in a large pot and add enough chicken broth to cover them. Add a few sprigs of fresh herbs, such as thyme, rosemary, and parsley, to infuse the chicken with flavor. Bring the broth to a gentle simmer and let the chicken cook for about 15-20 minutes, or until it reaches an internal temperature of 165°F (74°C).
Once the chicken is cooked, remove it from the poaching liquid and let it cool slightly before slicing or shredding it for your desired recipe. The poached chicken can be stored in the refrigerator for a few days, making it a convenient option for meal prep.
This method of cooking chicken ensures that it remains moist and tender, making it a healthier alternative to other cooking methods that may require added fats or oils.
These four recipes for delicate foods showcase the beauty and versatility of poaching as a cooking technique. Whether you’re preparing seafood, eggs, fruits, or poultry, poaching allows you to create flavorful and tender dishes that are sure to impress. Give these recipes a try and enjoy the gentle cooking method that brings out the best in delicate ingredients.
IX. Top Poaching Tools and Equipment on the Market
1. Stealth Cam G42NG No-Glow Trail Game Camera
The Stealth Cam G42NG No-Glow Trail Game Camera is a top-of-the-line device that is highly preferred by outdoor enthusiasts and wildlife photographers. With its advanced features and exceptional performance, this camera is designed to capture high-quality images and videos in any outdoor setting.
Product Information
The Stealth Cam G42NG No-Glow Trail Game Camera is equipped with a 10-megapixel camera that can capture stunning images with great clarity. It also has a 100-foot detection range, allowing you to monitor a large area effectively. The camera uses a no-glow infrared flash, which ensures that the camera remains undetectable to animals and humans alike.
Why People Prefer This Product
There are several reasons why people prefer the Stealth Cam G42NG No-Glow Trail Game Camera. Firstly, its high resolution and advanced image sensor allow for clear and detailed photos, even in low-light conditions. This is especially important for wildlife photographers who often need to capture images during dawn or dusk.
Secondly, the camera’s no-glow infrared flash is a significant advantage. It ensures that the camera remains completely invisible, making it ideal for capturing images of shy or nocturnal animals without disturbing them. This feature sets it apart from other trail cameras that use a visible flash, which can scare away animals and compromise the quality of the images.
Features
The Stealth Cam G42NG No-Glow Trail Game Camera comes with a range of features that enhance its performance and usability. These include:
- Quick trigger speed: The camera has a fast trigger speed of less than 0.5 seconds, ensuring that you never miss a moment.
- Multi-zone detection: It has a multi-zone detection feature that allows you to customize the camera’s detection area, ensuring that you capture images exactly where you want.
- Time-lapse mode: The camera also has a time-lapse mode, which is perfect for capturing long-term observations or monitoring changes in an area over time.
- HD video recording: In addition to capturing high-quality images, the camera can also record HD videos with sound, allowing you to capture the full experience of being in the wild.
Additional Features
Aside from its core features, the Stealth Cam G42NG No-Glow Trail Game Camera also offers several additional features that make it a versatile and user-friendly device. These include:
- Backlit menu programming: The camera’s menu is backlit, making it easy to navigate and adjust settings even in low-light conditions.
- Secure lock password protection: It has a secure lock password protection feature, ensuring that your camera and data remain safe from unauthorized access.
- External power jack: The camera has an external power jack, allowing you to extend its battery life by connecting it to an external power source.
Warranty & Service
The Stealth Cam G42NG No-Glow Trail Game Camera comes with a one-year manufacturer’s warranty, which covers any defects in materials or workmanship. In addition, the company offers excellent customer service and technical support, ensuring that any issues or concerns you may have are promptly addressed.
Pros
| Pros | Cons |
|---|---|
| High-resolution images | Relatively expensive compared to other trail cameras |
| No-glow infrared flash | Requires additional accessories for external power source |
| Fast trigger speed | Menu interface can be slightly complicated for beginners |
| Customizable detection area | |
| Time-lapse mode | |
| HD video recording | |
| Backlit menu programming | |
| Secure lock password protection | |
| External power jack |
The Stealth Cam G42NG No-Glow Trail Game Camera is a reliable and high-performing device that offers exceptional image quality, advanced features, and user-friendly functionality. Whether you are a wildlife photographer, a hunter, or simply someone who enjoys observing nature, this camera is an excellent choice for capturing stunning images and videos in the great outdoors.
2. Moultrie A-40 Pro Game Camera
The Moultrie A-40 Pro Game Camera is a top-of-the-line device that has gained popularity among outdoor enthusiasts and wildlife photographers. With its advanced features and reliable performance, it has become the go-to choice for capturing stunning images and videos in the wild.
Product Information
The Moultrie A-40 Pro Game Camera is equipped with a 14-megapixel resolution, ensuring high-quality images that capture every detail. Its long-range infrared flash allows for clear nighttime shots, while the fast trigger speed ensures that you never miss a moment. The camera also boasts a detection range of up to 60 feet, making it ideal for monitoring large areas.
Why People Prefer This Product
There are several reasons why the Moultrie A-40 Pro Game Camera is a preferred choice among outdoor enthusiasts. Firstly, its durability and weatherproof design make it suitable for use in any environment. Whether it’s rain or shine, this camera can withstand the elements, ensuring that you never miss a shot.
Secondly, the camera’s easy-to-use interface and intuitive controls make it accessible to both beginners and experienced photographers. With its simple setup and user-friendly menu, you can start capturing breathtaking images right away.
Lastly, the Moultrie A-40 Pro Game Camera offers excellent value for money. Compared to other cameras in its class, it provides a wide range of features at an affordable price point. This makes it a popular choice for those looking to invest in a high-quality game camera without breaking the bank.
Features
The Moultrie A-40 Pro Game Camera comes with a host of features that enhance its performance and usability. One notable feature is the Illumi-Night 2 Sensor, which provides bright and clear images even in low-light conditions. This ensures that you can capture stunning shots during dusk or dawn when wildlife activity is at its peak.
Another impressive feature is the camera’s time-lapse mode, which allows you to capture a series of images at set intervals. This is particularly useful for monitoring game trails or observing wildlife behavior over an extended period. Additionally, the camera supports HD video recording, enabling you to capture high-definition footage of wildlife in action.
Additional Features
In addition to its core features, the Moultrie A-40 Pro Game Camera offers several additional features that further enhance its functionality. These include a multi-shot mode, which allows you to capture multiple images in quick succession, and a burst mode, which captures a series of images when motion is detected.
The camera also features a time stamp on each image, providing valuable information about the date and time of capture. This is particularly useful for tracking animal behavior and establishing patterns. Furthermore, the camera supports SD cards up to 32GB, ensuring that you have ample storage space for your images and videos.
Warranty & Service
The Moultrie A-40 Pro Game Camera comes with a one-year warranty, which covers any manufacturing defects or malfunctions. Additionally, Moultrie offers excellent customer service, ensuring that any issues or concerns are promptly addressed. This gives users peace of mind knowing that their investment is protected and that they can rely on the company’s support if needed.
Pros
| Pros | Cons |
|---|---|
| High-quality images and videos | Limited detection range compared to some competitors |
| Durable and weatherproof design | Does not come with an SD card |
| Easy-to-use interface | No built-in viewer for reviewing images |
| Affordable price |
The Moultrie A-40 Pro Game Camera offers a range of benefits that make it a top choice for outdoor enthusiasts. Its high-quality images and videos, durable design, and user-friendly interface set it apart from the competition. While it may have some limitations, such as a limited detection range and the absence of an SD card, its overall performance and value make it a worthwhile investment for capturing stunning wildlife moments.
3. Bushnell Trophy Cam HD Essential E3 Trail Camera
The Bushnell Trophy Cam HD Essential E3 Trail Camera is a top-of-the-line device that is perfect for capturing wildlife in their natural habitat. With its advanced features and durable construction, this trail camera is a favorite among outdoor enthusiasts and wildlife photographers.
Product Information
The Bushnell Trophy Cam HD Essential E3 Trail Camera is equipped with a high-resolution 16-megapixel camera that captures stunning images and videos. It features a fast trigger speed of 0.3 seconds, ensuring that you never miss a shot. The camera also has a 100-foot detection range, allowing you to capture wildlife from a distance.
One of the standout features of this trail camera is its low-glow infrared flash, which ensures that your images and videos are clear and sharp, even in low-light conditions. The camera also has a built-in color display, making it easy to view and review your photos and videos right on the device.
Why People Prefer This Product
There are several reasons why people prefer the Bushnell Trophy Cam HD Essential E3 Trail Camera. Firstly, its high-resolution camera produces incredibly detailed images and videos, allowing you to capture every moment with precision. The fast trigger speed ensures that you never miss a shot, even with fast-moving wildlife.
Secondly, the low-glow infrared flash is a game-changer. It allows you to capture wildlife without alerting them to your presence, ensuring that you get natural and authentic shots. This feature is especially useful for capturing nocturnal animals or elusive species.
Lastly, the built-in color display is a convenient feature that sets this trail camera apart from others on the market. It allows you to instantly view your photos and videos without the need for a separate device. This is particularly useful when you’re out in the field and want to review your shots on the spot.
Additional Features
In addition to its impressive camera and flash capabilities, the Bushnell Trophy Cam HD Essential E3 Trail Camera has a range of additional features that make it a standout product. It has a programmable trigger interval, allowing you to capture images at set intervals. This is useful for monitoring wildlife activity over a longer period of time.
The camera also has a multi-image mode, which captures multiple images per trigger. This is ideal for capturing movement or action sequences. Additionally, the camera is equipped with a time-lapse mode, allowing you to capture stunning time-lapse videos of nature unfolding.
Warranty & Service
The Bushnell Trophy Cam HD Essential E3 Trail Camera comes with a limited one-year warranty, ensuring that you’re covered in case of any manufacturing defects. Bushnell also offers excellent customer service, with a dedicated support team ready to assist you with any questions or concerns you may have.
Pros
| Pros | Cons |
|---|---|
| High-resolution camera for detailed images and videos | May be considered pricey compared to other trail cameras |
| Fast trigger speed ensures you never miss a shot | Requires additional accessories for mounting |
| Low-glow infrared flash for clear images in low-light conditions | May have a learning curve for beginners |
| Built-in color display for easy photo and video viewing | |
| Programmable trigger interval for customized monitoring | |
| Multi-image mode for capturing movement sequences | |
| Time-lapse mode for stunning time-lapse videos |
4. Browning Strike Force HD Pro X Trail Camera
The Browning Strike Force HD Pro X Trail Camera is a top-of-the-line camera that is perfect for capturing high-quality images and videos in the great outdoors. With its advanced features and durable construction, this trail camera is a favorite among outdoor enthusiasts and wildlife photographers.
Product Information
The Browning Strike Force HD Pro X Trail Camera is equipped with a 20-megapixel camera that captures stunning images with exceptional clarity and detail. It also features a 0.22-second trigger speed, ensuring that you never miss a shot. The camera has a detection range of up to 80 feet, allowing you to capture wildlife from a distance without disturbing them.
One of the standout features of this trail camera is its invisible infrared flash. The camera uses an infrared LED flash that is completely undetectable to animals, ensuring that you can capture natural behavior without spooking your subjects. The flash has a range of up to 120 feet, allowing you to capture clear images even in low-light conditions.
Why People Prefer This Product
There are several reasons why people prefer the Browning Strike Force HD Pro X Trail Camera. Firstly, its high-resolution images and videos provide exceptional quality, allowing users to capture every detail of their outdoor adventures. The camera’s fast trigger speed ensures that users never miss a moment, while its long detection range allows for capturing wildlife from a safe distance.
Additionally, the invisible infrared flash is a major selling point for this trail camera. Many users appreciate the ability to capture natural behavior without disturbing the animals. The flash’s long range also ensures that users can capture clear images even in low-light conditions.
Features
The Browning Strike Force HD Pro X Trail Camera comes with a range of features that enhance its performance and usability. Some of the notable features include:
- 20-Megapixel Camera: Captures high-resolution images with exceptional clarity and detail.
- 0.22-Second Trigger Speed: Ensures that you never miss a shot, capturing fast-moving subjects with ease.
- 80-Foot Detection Range: Allows you to capture wildlife from a safe distance without disturbing them.
- Invisible Infrared Flash: Captures clear images without spooking animals, with a range of up to 120 feet.
- HD Video Recording: Records high-definition videos with sound, allowing you to capture the sights and sounds of nature.
- Time-Lapse Mode: Captures images at pre-set intervals, allowing you to create stunning time-lapse videos.
- Compact and Durable Design: The camera is compact and easy to carry, with a rugged construction that can withstand harsh outdoor conditions.
Additional Features
In addition to its core features, the Browning Strike Force HD Pro X Trail Camera offers several additional features that enhance its functionality. These include:
- Multi-Shot Mode: Allows you to capture multiple images in rapid succession, ensuring that you capture every moment.
- Adjustable Detection Range: Gives you the flexibility to customize the camera’s detection range based on your specific needs.
- Time and Date Stamp: Adds a time and date stamp to your images and videos, providing valuable information for analysis and documentation.
- SD Card Compatibility: The camera is compatible with SD cards up to 512GB, allowing for ample storage space for your images and videos.
Warranty & Service
The Browning Strike Force HD Pro X Trail Camera comes with a one-year warranty, providing peace of mind and assurance of its quality and durability. In case of any issues or defects, customers can rely on Browning’s excellent customer service for prompt assistance and resolution.
Pros and Cons
| Pros | Cons |
|---|---|
| High-resolution images and videos | Relatively high price compared to other trail cameras |
| Fast trig |

William Black is a seasoned wordsmith with a passion for crafting compelling content. Hailing from the vibrant city of Seattle, he has honed his writing skills through years of experience in the field. William holds a Bachelor’s degree in English Literature from the prestigious University of Washington, where he developed a deep appreciation for the power of storytelling. His educational background has equipped him with a keen eye for detail and a strong command of the English language. With a particular expertise in SEO writing, William effortlessly weaves keywords into his prose, ensuring maximum visibility and engagement. When he’s not busy crafting captivating content, you can find William exploring the local food scene, indulging in his love for all things culinary.