Contents
I. Introduction

Welcome to the world of Polish Pierogi Perfection! If you’ve ever tasted these delightful dumplings, you know that they are a true culinary masterpiece. But did you know that you can make them at home? In this article, we will guide you through the process of creating your own delicious pierogi from scratch.
Polish pierogi are a traditional dish that has been enjoyed by generations. They are made by wrapping a filling of your choice in a thin dough, which is then boiled or fried to perfection. The result is a mouthwatering combination of flavors and textures that will leave you craving for more.
One of the best things about making pierogi at home is that you have complete control over the ingredients. You can choose to fill your dumplings with classic options like potato and cheese, sauerkraut and mushroom, or even sweet fillings like fruit or chocolate. The possibilities are endless!
In this article, we will provide you with a step-by-step guide on how to make pierogi from scratch. We will cover everything from making the dough to preparing the fillings and cooking the dumplings. Whether you are a seasoned chef or a beginner in the kitchen, we guarantee that you will be able to create perfect pierogi with our easy-to-follow instructions.
So, put on your apron and get ready to embark on a culinary adventure. Polish pierogi perfection awaits you!
II. History of Pierogis
A. Origins of pierogis
Pierogis, also known as pierogi, are a traditional Polish dish that has gained popularity worldwide. These delicious dumplings are made by wrapping unleavened dough around a savory or sweet filling and then boiling or frying them. The origins of pierogis can be traced back to Central and Eastern Europe, with Poland being the country most commonly associated with this culinary delight.
The exact origin of pierogis is a subject of debate among food historians. Some believe that they were introduced to Poland by Italian traders in the 13th century, while others argue that they have Slavic roots dating back even further. Regardless of their precise origin, pierogis quickly became a staple in Polish cuisine and have since spread to other countries with Polish communities.
Traditionally, pierogis were made by hand in Polish households, with each family having their own unique recipes and techniques. They were often prepared for special occasions and holidays, such as Christmas and Easter. Over time, pierogis have evolved and adapted to different regional variations and culinary influences.
B. Traditional pierogi recipes
Traditional pierogi recipes vary depending on the region and the cook’s personal preferences. However, there are a few classic fillings that are commonly used in Polish cuisine.
One of the most popular traditional pierogi fillings is a mixture of potatoes and cheese. The potatoes are boiled, mashed, and then mixed with farmer’s cheese or cottage cheese. This filling is seasoned with salt, pepper, and sometimes onions or chives.
Another traditional filling is made with sauerkraut and mushrooms. The sauerkraut is cooked with onions and mushrooms, creating a flavorful and slightly tangy filling. This filling is often enjoyed during the Christmas season.
Other traditional fillings include meat, such as ground pork or beef, and fruits, such as cherries or blueberries, for sweet pierogis. Each filling is carefully prepared and seasoned to create a delicious combination of flavors.
C. Evolution of pierogi fillings
While traditional pierogi fillings remain popular, there has been a recent surge in creative and innovative fillings. Chefs and home cooks alike have experimented with different ingredients to create unique and modern pierogi flavors.
Some modern pierogi fillings include ingredients like spinach and feta cheese, bacon and cheddar cheese, or even sweet fillings like Nutella and strawberries. These new fillings add a contemporary twist to the classic dish and cater to a wider range of tastes.
The evolution of pierogi fillings reflects the changing culinary landscape and the desire for new and exciting flavors. While traditional pierogis will always hold a special place in Polish cuisine, the introduction of new fillings allows for endless possibilities and culinary exploration.
III. Essential Ingredients for Pierogi Dough

When it comes to making the perfect Polish pierogi at home, the dough is the foundation of this delectable dish. The right combination of ingredients will ensure that your pierogi turn out soft, tender, and full of flavor. In this section, we will explore the essential ingredients for pierogi dough and how they contribute to the overall taste and texture of these delightful dumplings.
A. Flour types for pierogi dough
The type of flour you use for your pierogi dough can greatly impact the final result. While all-purpose flour is commonly used, there are a few other options that can add a unique twist to your pierogi. Here are some flour types to consider:
- All-purpose flour: This is the most commonly used flour for pierogi dough. It has a moderate protein content, which helps create a tender and pliable dough.
- Bread flour: If you prefer a slightly chewier texture, you can substitute some or all of the all-purpose flour with bread flour. The higher protein content in bread flour will give your pierogi a firmer bite.
- Whole wheat flour: For a healthier twist, you can use whole wheat flour in your pierogi dough. Keep in mind that whole wheat flour has a higher fiber content, which can result in a denser dough. You may need to adjust the liquid ingredients accordingly.
- Gluten-free flour: If you have dietary restrictions or prefer a gluten-free option, there are various gluten-free flour blends available that can be used in place of regular flour. These blends typically contain a combination of rice flour, tapioca starch, and potato starch.
Experimenting with different flour types can add a unique flavor and texture to your pierogi. Feel free to mix and match to find your perfect combination.
B. Liquid ingredients for pierogi dough
While flour forms the base of the dough, the liquid ingredients are equally important in achieving the desired consistency. Here are the common liquid ingredients used in pierogi dough:
- Water: Water is the most basic and commonly used liquid for pierogi dough. It hydrates the flour and helps bind the ingredients together.
- Milk: Adding milk to the dough can result in a softer and more tender texture. It also adds a subtle richness to the flavor.
- Sour cream: For an extra creamy and tangy dough, you can incorporate sour cream. This ingredient adds a delightful richness and enhances the overall flavor of the pierogi.
- Eggs: Eggs are often added to pierogi dough to provide structure and richness. They contribute to a softer and more elastic dough.
When combining the liquid ingredients with the flour, it’s important to add them gradually and adjust as needed. The goal is to achieve a dough that is soft and pliable, but not too sticky.
C. Adding flavor to pierogi dough
While the dough itself is relatively plain, you can easily infuse it with additional flavors to enhance the overall taste of your pierogi. Here are some ways to add flavor to your pierogi dough:
- Herbs and spices: Incorporating herbs and spices into the dough can add a subtle yet distinct flavor. Some popular options include parsley, dill, garlic powder, onion powder, and black pepper.
- Cheese: Adding grated cheese, such as cheddar or Parmesan, to the dough can create a savory and cheesy pierogi. This is especially delicious when paired with fillings like potato and cheese or sauerkraut and mushroom.
- Vegetable purees: Pureeing vegetables like spinach, beetroot, or pumpkin and incorporating them into the dough can not only add flavor but also give your pierogi a vibrant color.
When adding flavor to the dough, it’s important to consider the filling you plan to use. Ensure that the flavors complement each other and create a harmonious balance.
By understanding the essential ingredients for pierogi dough and how they contribute to the overall taste and texture, you can create homemade pierogi that are truly perfection. Whether you stick to traditional ingredients or experiment with unique flavors, the dough is the key to a delicious and satisfying pierogi experience.
IV. Step-by-Step Guide to Making Pierogi Dough

Polish Pierogi Perfection: Making Dumplings at Home is an art that requires mastering the technique of making the perfect pierogi dough. In this section, I will guide you through the step-by-step process of mixing the dough ingredients, kneading and resting the dough, and rolling out the dough. Follow these instructions carefully to achieve the desired texture and taste of your homemade pierogi.
A. Mixing the dough ingredients
Before you start mixing the dough ingredients, gather the following ingredients:
- 2 cups all-purpose flour
- 1/2 teaspoon salt
- 1 large egg
- 1/2 cup lukewarm water
To begin, create a well in the center of the flour in a large mixing bowl. Crack the egg into the well and add the salt. Gradually pour in the lukewarm water while stirring the mixture with a fork or your fingers. Continue mixing until the dough starts to come together.
Next, transfer the dough onto a lightly floured surface and knead it for about 5 minutes. The dough should be smooth and elastic. If it feels too sticky, add a little more flour. Conversely, if it feels too dry, sprinkle some water onto the dough.
Once the dough reaches the desired consistency, shape it into a ball and cover it with a clean kitchen towel. Let it rest for at least 30 minutes to allow the gluten to relax and the dough to become more pliable.
B. Kneading and resting the dough
After the resting period, it’s time to knead the dough again to further develop its elasticity. Lightly dust your work surface with flour and place the dough on it. Use the heel of your hand to push the dough away from you, then fold it back over itself. Repeat this motion for about 10 minutes, or until the dough becomes smooth and springs back when pressed with your finger.
Once you’ve finished kneading, shape the dough into a ball and cover it with the kitchen towel. Let it rest for another 30 minutes to allow the gluten to relax further.
C. Rolling out the dough
Now that the dough has rested, it’s time to roll it out into thin sheets for your pierogi. Divide the dough into smaller portions to make it more manageable. Take one portion and flatten it with your hands. Lightly dust your rolling pin and work surface with flour to prevent sticking.
Begin rolling the dough from the center outwards, applying even pressure as you go. Rotate the dough occasionally to ensure an even thickness. Aim for a thickness of about 1/8 inch or less, depending on your preference.
Once you’ve rolled out the dough, you can use a round cookie cutter or a glass to cut out circles for your pierogi. Place a spoonful of your desired filling in the center of each circle, then fold the dough over to form a half-moon shape. Pinch the edges firmly to seal the pierogi.
Repeat the rolling, cutting, filling, and sealing process with the remaining dough portions until you have made all the pierogi you desire.
Now that you have successfully made the pierogi dough, you can proceed to cook them by boiling or frying them to perfection. Enjoy the fruits of your labor and savor the delicious taste of homemade Polish pierogi!
V. Popular Pierogi Fillings

Pierogi, a traditional Polish dumpling, is a versatile dish that can be filled with a variety of delicious ingredients. From classic potato and cheese fillings to sweet fruit fillings and savory meat fillings, there are endless possibilities to explore. In this section, we will delve into the most popular pierogi fillings and discover the unique flavors they bring to this beloved dish.
A. Classic Potato and Cheese Filling
The classic potato and cheese filling is a staple in Polish cuisine and a favorite among pierogi enthusiasts. To create this filling, boiled potatoes are mashed and combined with creamy farmer’s cheese, creating a rich and indulgent mixture. The filling is then seasoned with salt, pepper, and sometimes chives or onions for added flavor.
When cooked, the potato and cheese filling becomes soft and creamy, contrasting beautifully with the slightly chewy texture of the dumpling dough. The combination of the smooth potato filling and the tangy cheese creates a harmonious blend of flavors that is both comforting and satisfying.
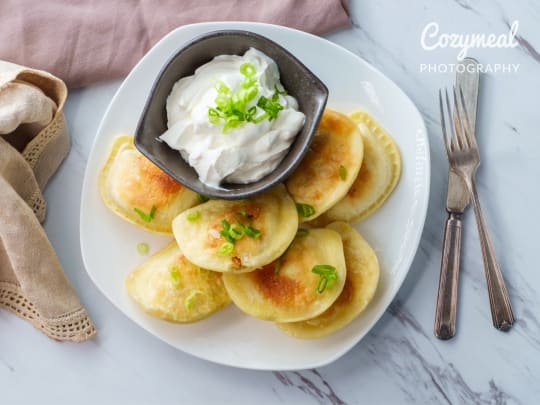
Classic potato and cheese pierogi are often served with a dollop of sour cream and a sprinkle of crispy bacon or fried onions. The creamy filling pairs well with the tangy sour cream, while the bacon or fried onions add a delightful crunch and savory element to the dish.
B. Sweet Fruit Fillings
For those with a sweet tooth, sweet fruit fillings offer a delightful twist on traditional pierogi. Popular fruit fillings include cherries, blueberries, strawberries, and plums. The fruits are typically cooked down with sugar to create a sweet and juicy filling that bursts with flavor.
When making sweet fruit pierogi, it is important to use ripe and flavorful fruits to ensure the filling is delicious. The dough is rolled out and cut into circles, then filled with a spoonful of the fruit mixture. The edges are sealed, and the pierogi are boiled until they float to the surface, indicating they are cooked through.
Sweet fruit pierogi are often served as a dessert or a sweet treat. They can be enjoyed on their own or topped with powdered sugar, a drizzle of chocolate sauce, or a dollop of whipped cream. The combination of the tender dough and the sweet, fruity filling creates a delightful dessert that is sure to satisfy any sweet craving.
C. Savory Meat Fillings
For meat lovers, savory meat fillings are a popular choice for pierogi. Ground meat, such as beef, pork, or chicken, is cooked with onions, garlic, and a variety of spices to create a flavorful filling. Some variations also include mushrooms or cabbage for added texture and taste.
The meat filling is typically cooked and seasoned before being used as a pierogi filling. The dough is rolled out and cut into circles, then filled with a spoonful of the meat mixture. The edges are sealed, and the pierogi are boiled until they are cooked through.
Savory meat pierogi are often served as a main course or as part of a hearty meal. They can be enjoyed with a side of sour cream or a tangy tomato sauce. The combination of the tender dough and the savory, meaty filling creates a satisfying and flavorful dish that is perfect for any meat lover.
VI. Step-by-Step Guide to Making Pierogi Fillings
A. Preparing the Potato and Cheese Filling
One of the most popular and traditional fillings for pierogi is the potato and cheese filling. It’s a simple yet delicious combination that is loved by many. Here’s a step-by-step guide on how to prepare this filling:
- Start by boiling the potatoes until they are soft and tender. You can use any type of potatoes, but russet potatoes are commonly used for pierogi fillings.
- Once the potatoes are cooked, drain them and let them cool slightly. Then, peel off the skin and mash them using a potato masher or a fork. Make sure to remove any lumps for a smooth filling.
- In a separate bowl, mix the mashed potatoes with grated cheese. The most commonly used cheese for pierogi fillings is farmer’s cheese or cheddar cheese. You can also add some finely chopped onions or garlic for extra flavor.
- Season the filling with salt and pepper to taste. You can also add some herbs like parsley or dill for added freshness.
- Once the filling is well combined, it’s ready to be used for filling the pierogi dough. Spoon a small amount of the filling onto the center of each dough circle, then fold the dough over and seal the edges.
Now you have a delicious potato and cheese filling for your pierogi. This filling pairs well with sour cream or a simple tomato sauce. Enjoy!
B. Making Sweet Fruit Fillings
If you have a sweet tooth, you’ll love the idea of making sweet fruit fillings for your pierogi. They make a perfect dessert or a sweet treat. Here’s how you can make sweet fruit fillings for your pierogi:
- Choose your favorite fruits for the filling. Some popular choices include strawberries, blueberries, cherries, and apples.
- Wash and prepare the fruits by removing any stems, seeds, or pits. If using apples, peel and dice them into small pieces.
- In a saucepan, cook the fruits over medium heat with a little bit of water and sugar. Stir occasionally until the fruits are soft and the sugar has dissolved.
- Once the fruits are cooked, let them cool slightly. Then, mash them with a fork or blend them in a food processor until you have a smooth filling.
- Taste the filling and adjust the sweetness by adding more sugar if needed. You can also add some cinnamon or vanilla extract for extra flavor.
- Similar to the savory fillings, spoon a small amount of the sweet fruit filling onto each dough circle, fold the dough over, and seal the edges.
Your sweet fruit pierogi are now ready to be cooked. You can serve them with a dusting of powdered sugar, a dollop of whipped cream, or a scoop of vanilla ice cream. Enjoy the sweet and fruity goodness!
C. Cooking Savory Meat Fillings
If you’re a meat lover, savory meat fillings for pierogi are a must-try. They are hearty, flavorful, and perfect for a satisfying meal. Here’s a step-by-step guide on how to make savory meat fillings:
- Choose your preferred type of meat for the filling. Some popular choices include ground beef, ground pork, or a combination of both.
- In a skillet, heat some oil over medium heat and sauté finely chopped onions and garlic until they are translucent and fragrant.
- Add the ground meat to the skillet and cook until it’s browned and cooked through. Make sure to break up any lumps with a spatula or a wooden spoon.
- Season the meat with salt, pepper, and your favorite herbs and spices. Some common choices include paprika, thyme, rosemary, or oregano.
- Once the meat is well seasoned, let it cool slightly before using it as a filling for the pierogi dough.
- Similar to the other fillings, spoon a small amount of the savory meat filling onto each dough circle, fold the dough over, and seal the edges.
Your savory meat pierogi are now ready to be cooked. You can boil them in salted water, pan-fry them until crispy, or bake them in the oven. Serve them with your favorite sauce or condiments. Enjoy the delicious and meaty pierogi!
Remember, making pierogi fillings is all about creativity and personal preference. Feel free to experiment with different ingredients, flavors, and combinations to create your own unique fillings. Whether you prefer savory or sweet, vegetarian or meaty, there’s a pierogi filling out there for everyone to enjoy!
VII. Filling and Shaping Pierogis
When it comes to making delicious Polish pierogis at home, the filling and shaping process is crucial. In this section, we will explore traditional pierogi shaping techniques, the use of pierogi molds for consistent results, and tips for sealing pierogis properly.
A. Traditional pierogi shaping techniques
Shaping pierogis by hand is a time-honored tradition that adds a personal touch to these delectable dumplings. To shape pierogis using the traditional method, follow these steps:
- Roll out the pierogi dough on a lightly floured surface until it is about 1/8 inch thick.
- Using a round cookie cutter or a glass, cut out circles from the dough. The size of the circles will depend on your preference, but a diameter of around 3-4 inches is common.
- Place a spoonful of your desired filling in the center of each dough circle.
- Fold the dough circle in half, creating a half-moon shape. Press the edges together firmly to seal the pierogi.
- If desired, you can crimp the edges of the pierogi with a fork or your fingers to create a decorative pattern.
Repeat these steps until all the dough and filling have been used. The traditional shaping method allows for a rustic appearance and a satisfying homemade feel.
B. Using pierogi molds for consistent results
If you prefer a more uniform and professional-looking pierogi, using a pierogi mold can be a game-changer. These molds are designed to streamline the shaping process and ensure consistent results. Here’s how to use a pierogi mold:
- Roll out the pierogi dough to the desired thickness, just like with the traditional method.
- Place the dough on the pierogi mold, ensuring it covers the entire surface.
- Add a spoonful of filling to each indentation on the mold.
- Brush the edges of the dough with water to help with sealing.
- Fold the mold in half, pressing firmly to seal the pierogis.
- Remove the individual pierogis from the mold and repeat the process until all the dough and filling have been used.
Using a pierogi mold can save time and effort while still producing beautifully shaped pierogis.
C. Tips for sealing pierogis properly
Properly sealing pierogis is essential to prevent the filling from leaking out during cooking. Follow these tips to ensure your pierogis are well-sealed:
- Make sure the edges of the dough are moist before sealing. This can be achieved by brushing them with water or egg wash.
- Press the edges firmly together to create a tight seal. You can use your fingers or the tines of a fork to achieve this.
- Avoid overfilling the pierogis, as this can make it difficult to seal them properly. Use a spoonful of filling that allows for easy sealing without bursting.
- If you notice any small tears or openings in the dough, patch them up with a little extra dough or press the edges together again.
- Be gentle when handling the pierogis to prevent any accidental openings or breakage.
By following these tips, you can ensure that your pierogis are sealed tightly and retain their delicious filling.
Whether you choose to shape your pierogis by hand or use a mold, the filling and shaping process is an important step in creating perfect Polish dumplings. Experiment with different fillings and techniques to find your favorite combination, and enjoy the satisfaction of making these delightful treats from scratch.
VIII. Cooking Pierogis
A. Boiling Pierogis
Boiling pierogis is a classic and simple method of cooking that ensures a soft and tender texture. Follow these steps to boil your pierogis to perfection:
- Fill a large pot with water and bring it to a boil.
- Add a generous amount of salt to the boiling water. This will enhance the flavor of the pierogis.
- Gently drop the pierogis into the boiling water, making sure not to overcrowd the pot. Stir them gently to prevent sticking.
- Boil the pierogis for about 5-7 minutes, or until they float to the surface. This indicates that they are fully cooked.
- Using a slotted spoon, carefully remove the cooked pierogis from the pot and transfer them to a plate or serving dish.
- Serve the boiled pierogis hot, with your choice of toppings or sauces.
Boiling pierogis is a foolproof method that guarantees a soft and pillowy texture. It is a great option if you prefer a more traditional approach to cooking pierogis.
B. Pan-Frying Pierogis
Pan-frying pierogis is an excellent way to achieve a crispy and golden exterior while maintaining a soft and flavorful filling. Follow these steps to pan-fry your pierogis:
- Heat a tablespoon of oil or butter in a skillet over medium heat.
- Add the pierogis to the skillet, making sure not to overcrowd them. Cook them in batches if necessary.
- Fry the pierogis for about 2-3 minutes on each side, or until they turn golden brown.
- Once the pierogis are cooked, remove them from the skillet and transfer them to a plate lined with paper towels to absorb any excess oil.
- Serve the pan-fried pierogis hot, with your favorite dipping sauce or toppings.
Pan-frying pierogis adds a delightful crunch to the dumplings, making them a perfect option for those who enjoy a crispy texture.
C. Baking Pierogis
Baking pierogis is a convenient and hands-off method that allows you to cook a large batch of pierogis at once. Follow these steps to bake your pierogis:
- Preheat your oven to 375°F (190°C).
- Place the pierogis on a baking sheet lined with parchment paper or aluminum foil.
- Brush the pierogis with melted butter or oil to enhance their flavor and prevent them from drying out.
- Bake the pierogis in the preheated oven for about 20-25 minutes, or until they are heated through and slightly crispy.
- Once the pierogis are baked, remove them from the oven and let them cool for a few minutes before serving.
- Serve the baked pierogis warm, with your preferred accompaniments.
Baking pierogis is a convenient option when you want to cook a large quantity or prefer a hands-off cooking method. The oven ensures even cooking and allows you to multitask while the pierogis bake to perfection.
IX. Serving and Storing Pierogis
When it comes to enjoying the delightful Polish dish of pierogis, there are a few important considerations to keep in mind. From traditional accompaniments to freezing and reheating methods, this section will guide you on how to serve and store pierogis for the best culinary experience.
A. Traditional Pierogi Accompaniments
Polish cuisine is known for its rich flavors and hearty dishes, and pierogis are no exception. To enhance the taste and elevate your pierogi experience, consider serving them with these traditional accompaniments:
- Sour Cream: A dollop of tangy sour cream is a classic pairing with pierogis. Its creamy texture and slightly acidic taste complement the savory filling perfectly.
- Fried Onions: Caramelized fried onions add a delightful sweetness and depth of flavor to pierogis. They provide a satisfying crunch and enhance the overall taste.
- Bacon Bits: Crispy bacon bits sprinkled over pierogis add a smoky and savory element. They provide a burst of flavor and a delightful contrast in texture.
- Applesauce: For a touch of sweetness, serve pierogis with a side of applesauce. The combination of the savory dumplings and the fruity sauce creates a harmonious balance of flavors.
These traditional accompaniments not only enhance the taste of pierogis but also add visual appeal to the dish. Experiment with different combinations to find your favorite pairing.
B. Freezing Pierogis for Later Use
If you have made a large batch of pierogis or want to prepare them in advance, freezing is a convenient option. Follow these steps to freeze pierogis for later use:
- Cook the Pierogis: Boil the pierogis until they float to the surface, indicating they are fully cooked. Remove them from the boiling water and let them cool completely.
- Arrange on a Baking Sheet: Place the cooled pierogis in a single layer on a baking sheet lined with parchment paper. Make sure they are not touching each other to prevent sticking.
- Flash Freeze: Put the baking sheet with the pierogis in the freezer and let them freeze for about an hour. This process, known as flash freezing, prevents the pierogis from sticking together.
- Transfer to Freezer Bags: Once the pierogis are partially frozen, transfer them to freezer bags. Remove any excess air from the bags and seal them tightly.
- Label and Date: Write the contents and date on the freezer bags for easy identification.
- Store in the Freezer: Place the labeled freezer bags in the freezer and store them for up to three months.
Freezing pierogis allows you to have a quick and convenient meal option whenever you crave these delicious dumplings.
C. Reheating Pierogis
When it’s time to enjoy your frozen pierogis, follow these simple steps to reheat them:
- Boil: Bring a pot of water to a gentle boil.
- Add Pierogis: Carefully add the frozen pierogis to the boiling water. Cook them for about 5 minutes or until they float to the surface.
- Drain: Using a slotted spoon, remove the pierogis from the boiling water and drain them well.
- Sauté: Heat a skillet over medium heat and add a small amount of butter or oil. Sauté the pierogis until they are lightly browned and crispy on the outside.
- Serve: Transfer the reheated pierogis to a serving plate and enjoy them with your favorite accompaniments.
Reheating pierogis brings them back to life, restoring their delicious flavors and textures.
By following these serving and storing tips, you can enjoy the delightful taste of pierogis at any time. Whether you’re serving them with traditional accompaniments, freezing them for later use, or reheating them to perfection, pierogis are sure to satisfy your cravings and bring a touch of Polish perfection to your table.
A. Dough too sticky or dry
One of the most common issues when making pierogis at home is dealing with dough that is either too sticky or too dry. This can make it difficult to roll out the dough and shape it into the desired dumplings. Here are a few tips to troubleshoot this problem:
- Adjust the flour-to-water ratio: If the dough is too sticky, gradually add more flour until it reaches the right consistency. On the other hand, if the dough is too dry, add small amounts of water until it becomes more pliable.
- Knead the dough properly: Kneading the dough helps to develop the gluten, which gives the dough elasticity. If the dough is too sticky, knead it with floured hands until it becomes smoother and less sticky. If the dough is too dry, knead it with wet hands to add moisture.
- Rest the dough: Letting the dough rest for at least 30 minutes before rolling it out can help to relax the gluten and make it easier to work with. Cover the dough with a damp cloth or plastic wrap to prevent it from drying out.
B. Filling leaking during cooking
Another common issue when cooking pierogis is the filling leaking out during the cooking process. This can result in a loss of flavor and a messy appearance. Here are some tips to prevent filling leakage:
- Seal the edges properly: When shaping the pierogis, make sure to seal the edges tightly to prevent any gaps or openings. Use your fingers or a fork to press the edges together firmly.
- Avoid overfilling: Be careful not to overfill the pierogis with the filling. Leave enough space around the edges to ensure a proper seal. Overfilling can put too much pressure on the dough and cause it to burst open during cooking.
- Use a thick filling consistency: If your filling is too runny or watery, it is more likely to leak out. Make sure your filling has a thick and cohesive consistency. You can add breadcrumbs, mashed potatoes, or cheese to help bind the filling together.
C. Pierogis falling apart
One frustrating issue that can occur when making pierogis is when they fall apart during cooking. This can be due to various factors, including dough that is too thin or overcooking. Here are some tips to prevent pierogis from falling apart:
- Roll the dough to the right thickness: When rolling out the dough, make sure it is not too thin. Thin dough can easily tear or break apart during cooking. Aim for a thickness of about 1/8 inch.
- Handle the pierogis gently: When transferring the pierogis to the boiling water or when flipping them in the pan, handle them with care. Use a slotted spoon or spatula to avoid damaging the delicate dough.
- Do not overcook: Overcooking the pierogis can cause the dough to become too soft and fragile, leading to them falling apart. Cook the pierogis just until they float to the surface and are tender.
By following these troubleshooting tips, you can overcome common issues when making pierogis at home. With practice and patience, you’ll be able to create perfect dumplings that are delicious and visually appealing.

William Black is a seasoned wordsmith with a passion for crafting compelling content. Hailing from the vibrant city of Seattle, he has honed his writing skills through years of experience in the field. William holds a Bachelor’s degree in English Literature from the prestigious University of Washington, where he developed a deep appreciation for the power of storytelling. His educational background has equipped him with a keen eye for detail and a strong command of the English language. With a particular expertise in SEO writing, William effortlessly weaves keywords into his prose, ensuring maximum visibility and engagement. When he’s not busy crafting captivating content, you can find William exploring the local food scene, indulging in his love for all things culinary.